
If you have a blog website or thinking of starting a blog, then you should have a contact page where your audience can ask doubts, send appreciation, and much more.
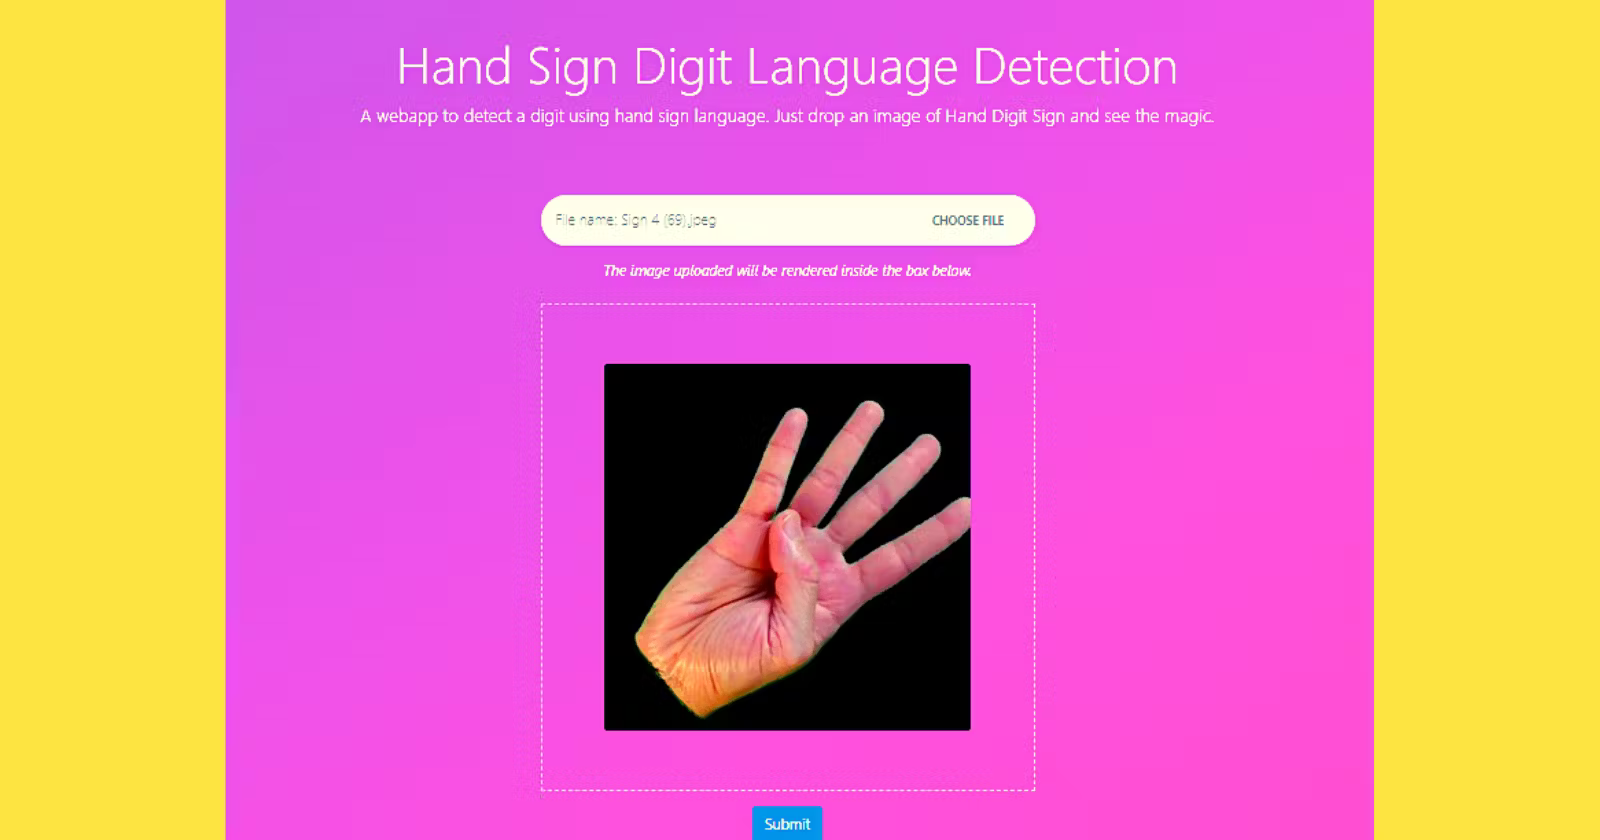
See the Demo.
Introduction
In this tutorial, we are going to make a contact form for our blog, in which our users can send a message and we’ll get that message on our email account immediately and even save it to the database.
Tech stack we are going to use:
- Python
- Flask
- Flask-Mail
- Flask-SQLAlchemy
- Bootstrap
- XAMPP
Now, don’t worry after seeing the above technologies.
Flask is written in Python and it is a small and lightweight web framework that provides useful tools and features that make creating web applications in Python easier.
The Flask-Mail extension provides a simple interface to set up SMTP with your Flask application and to send messages from your views and scripts.
Flask-SQLAlchemy is an extension for Flask that adds support for SQLAlchemy to your application. It aims to simplify using SQLAlchemy with Flask by providing useful defaults and extra helpers that make it easier to accomplish common tasks.
Bootstrap is a potent front-end framework used to create modern websites and web apps. It provides readymade templates and designs so you don’t have to write any HTML, CSS, and JavaScript from scratch.
XAMPP is a free and open-source cross-platform web server solution stack. here, we use it for creating a MySQL database. It provides a simple user interface that makes it super easy to create a MySQL database.
Pre-Requisites
Before you start, you will need:
- Python 3 is installed on your system. If not installed then click here to download.
- You must have the basic knowledge of using Flask.
1. Setting up Flask
Step 1: Installing Flask
We’ll start by installing Flask in our local environment.
|
1 |
pip install Flask |
Step 2: Importing Flask and Creating minimal flask app
Create a directory and open it in your IDE or Code-editor (PyCharm is recommended) and then create a .py file.
|
1 2 3 4 5 6 7 8 9 10 |
from flask import Flask app = Flask(__name__) @app.route("/") def hello_world(): return "<p>Hello, World!</p>" if __name__=="__main__": app.run(debug=True) |
We are importing the Flask class from the flask and creating a minimal flask app and for running our app we’ve added app.run(debug=True).
debug=True means that every time we make changes to our application we don’t need to run our app again and again.
Go ahead and run your app, you’ll see a link with port number 5000 where your app is served.
|
1 2 3 4 5 6 7 8 9 |
* Serving Flask app 'test' (lazy loading) * Environment: production WARNING: This is a development server. Do not use it in a production deployment. Use a production WSGI server instead. * Debug mode: on * Restarting with watchdog (windowsapi) * Debugger is active! * Debugger PIN: 104-469-469 * Running on http://127.0.0.1:5000/ (Press CTRL+C to quit) |
Click on the link and you’ll see a webpage like below

We created our Flask app and ran it successfully on the browser.
Let’s move on to the next step.
2. Bootstrap Contact Page Template
Step 1: Getting the template
Go ahead and download the template. It is a free template with cool animations and designs. You can find different ones also.
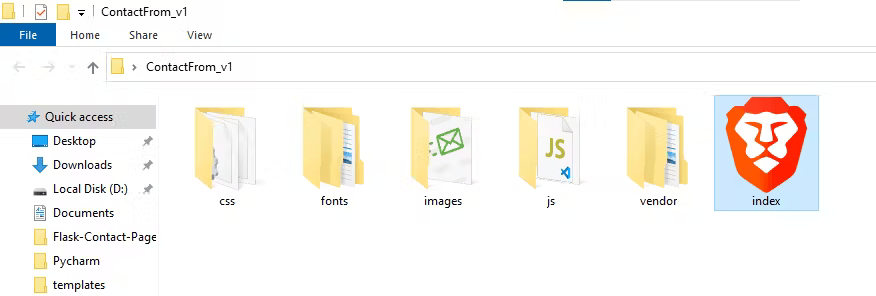
Step 2: Extracting the template and running the file
After downloading the template, extract it and then open the extracted folder and run the index.html file to see the contact form in the browser.
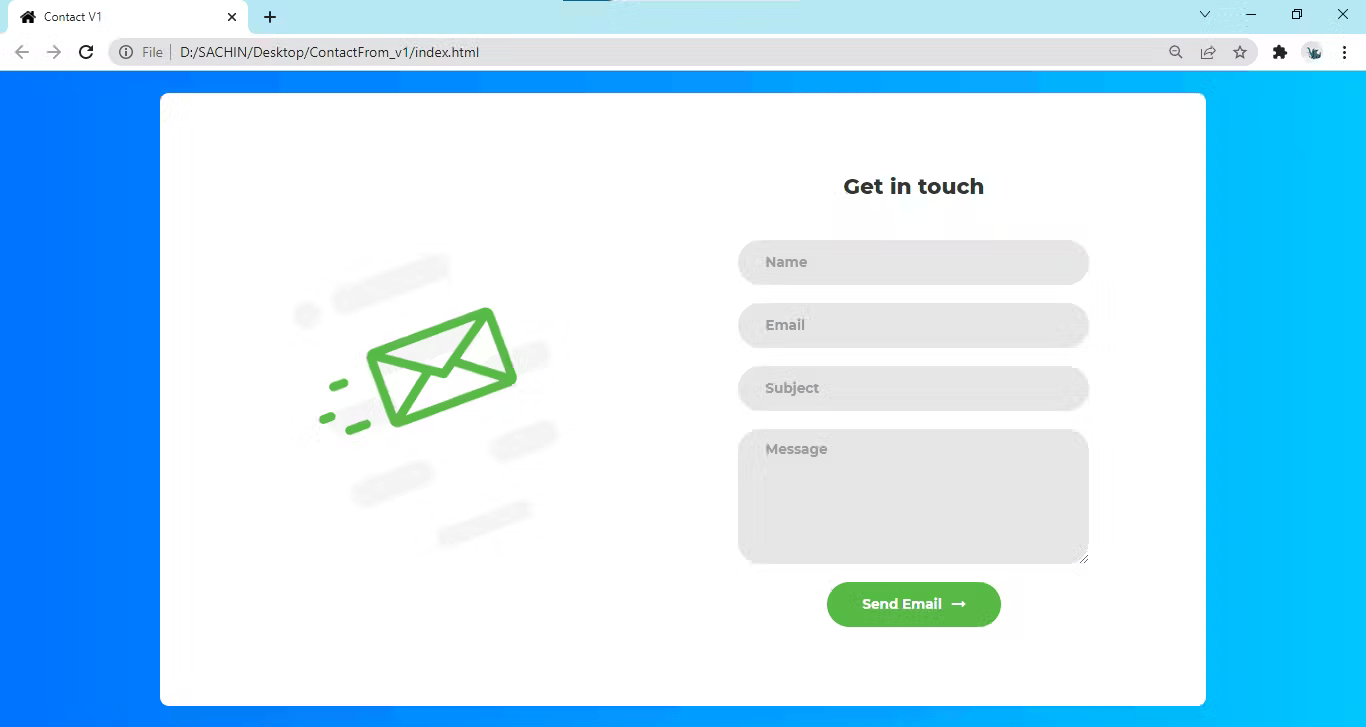
Cool, we are close to making it fully functional.
3. Modifying the folder structure
Step 1: Making static and templates folder in the Flask directory
Now open your Flask directory and make two folders
- static
- templates
We make a static folder to store images, CSS, and JavaScript files in the flask. This folder is public so don’t store confidential data inside it.
In the templates folder, we store our .html files that’ll be rendered using the flask.
Step 2: Moving files in the Flask directory
Now we have to move the files inside our extracted contact form folder to the static and templates folder in the flask directory.
Select all the files except index.html from the contact form folder and move them inside the static folder which we made just now.
And move the index.html file inside the templates folder.
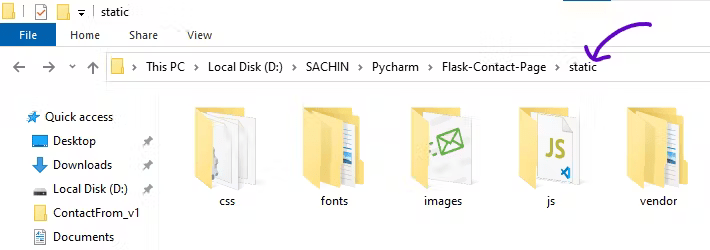
Folder structure of static inside the flask directory.
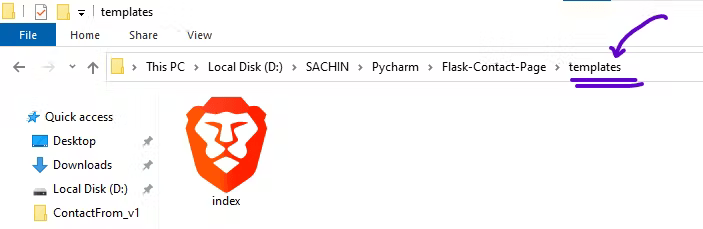
Folder structure of templates inside the flask directory.
4. Modifying & Rendering the HTML file
If you are going to render the template using the flask then you’ll get only the HTML content, there will be no CSS, JavaScript, and images will be rendered.
Step 1: Modifying the HTML file
We have to modify the HTML file to get the CSS, JavaScript, and images rendered from the static folder.
To modify the HTML file, open it in the code editor. I would recommend using Sublime Text because we can use Jinja templates quite easily inside Sublime Text to modify the.html file.
If you are using VS Code then you need to install certain extensions and make changes in settings, it kinda gets messy but it’s your choice whichever code editor you want to use.
If you’ve worked with Flask development then you know that we use Jinja templates and the url_for() method to serve files inside the static folder to the HTML file inside the templates folder.
|
1 |
{{ url_for ( 'static', filename='your/css/or/js/file/here' ) }} |
Now we’ll just replace all the href and scripts with the above syntax.
The link tag and script tag of your HTML file will look like this
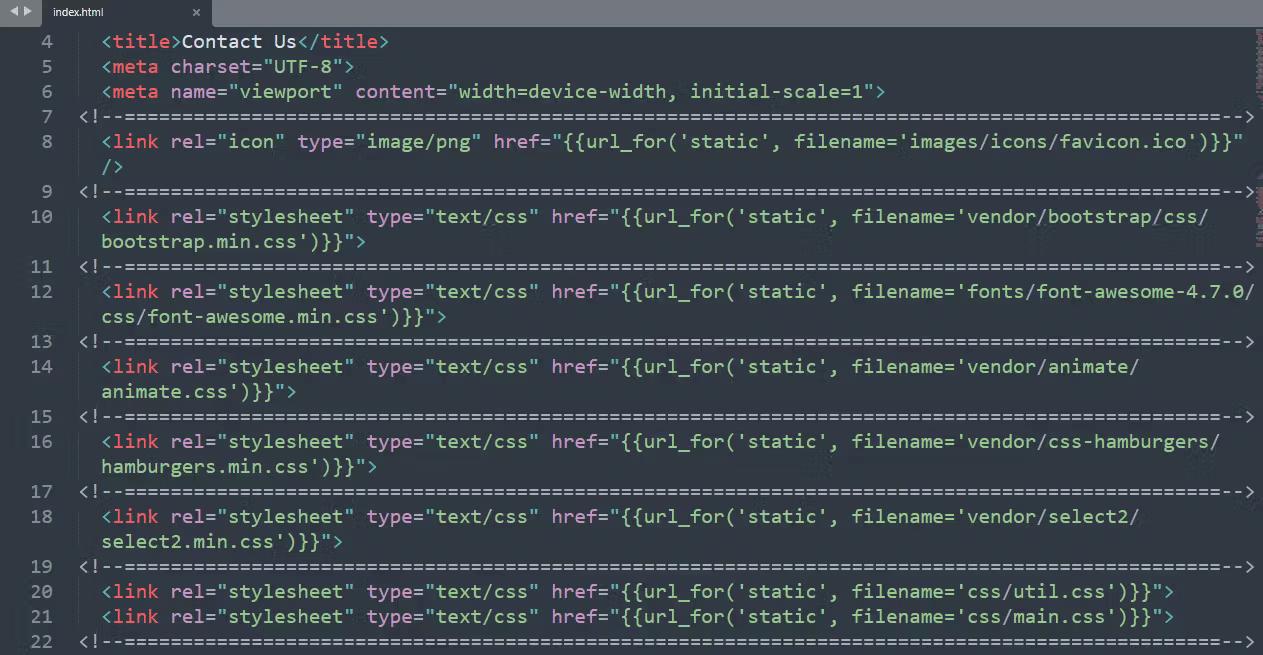
All the link tag is modified.
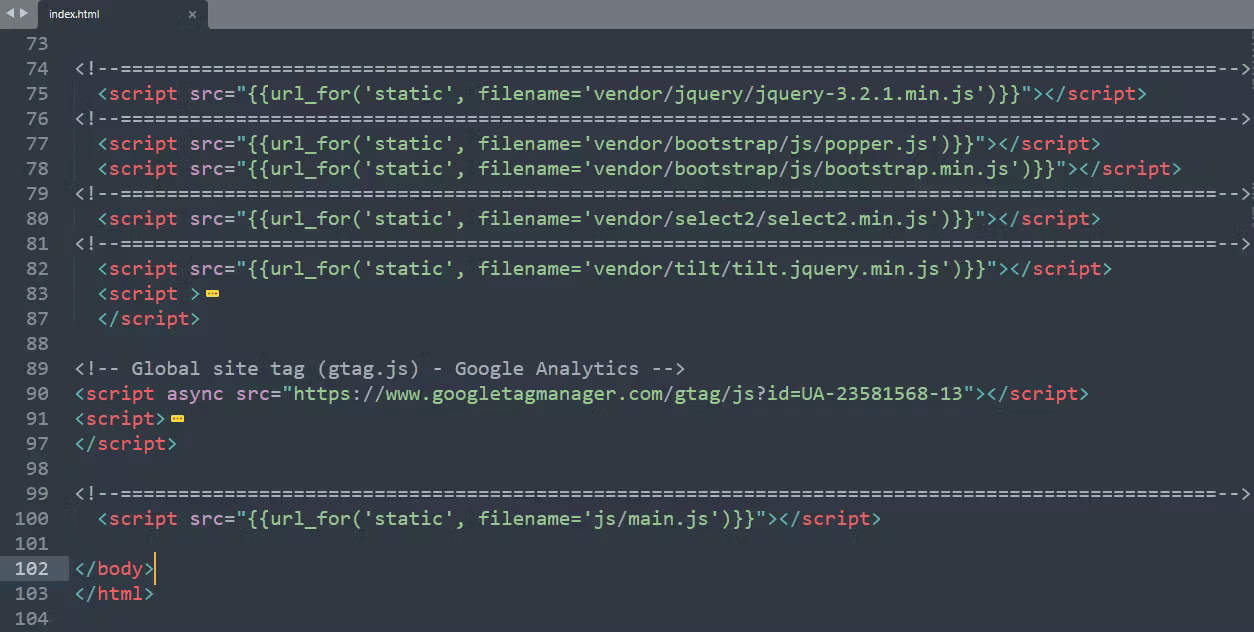
All the script tag is modified.
Now after doing all the modifications successfully, we are good to render the HTML file using the flask.
Step 2: Rendering using the flask
To render the files inside the templates folder using the flask, we use the render_template method.
|
1 2 3 4 5 6 7 8 9 10 |
from flask import Flask, render_template app = Flask(__name__) @app.route("/") def contact(): return render_template("index.html") if __name__=="__main__": app.run(debug=True) |
Here, we imported the render_template from the flask and used it to return the .html file.
Now, again run your flask app or just reload the localhost server in the browser and you’ll see your template rendering successfully.
We are halfway through making it fully functional.
5. Creating DB
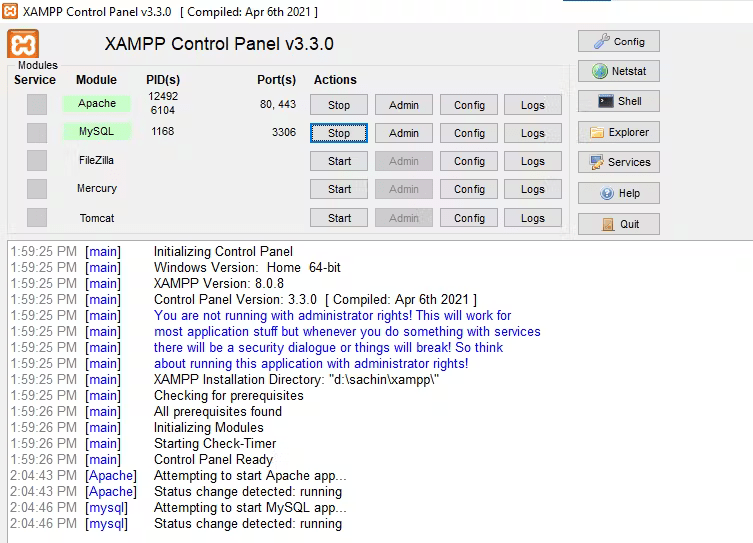
Step 1: Setting up XAMPP
To create a database, we need to start our MySQL and Apache server, and to do so we need to install XAMPP first.
If you have XAMPP installed then it’s fine otherwise download from here.
A step-by-step guide to installing the XAMPP.
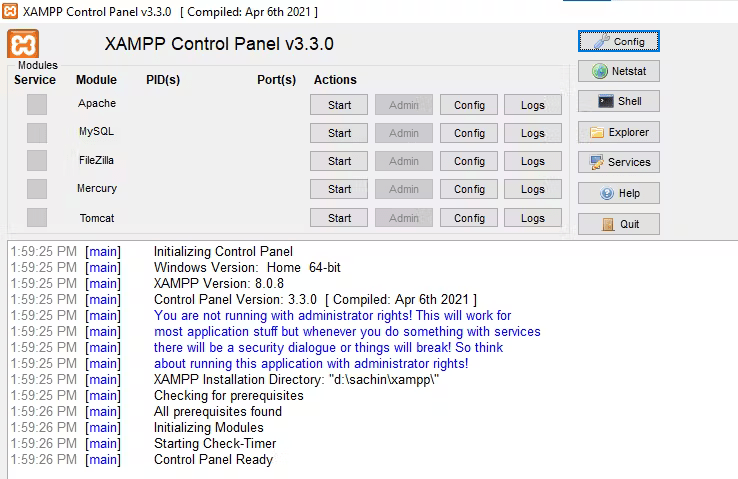
After installation, search for the XAMPP control panel and start Apache and MySQL server.
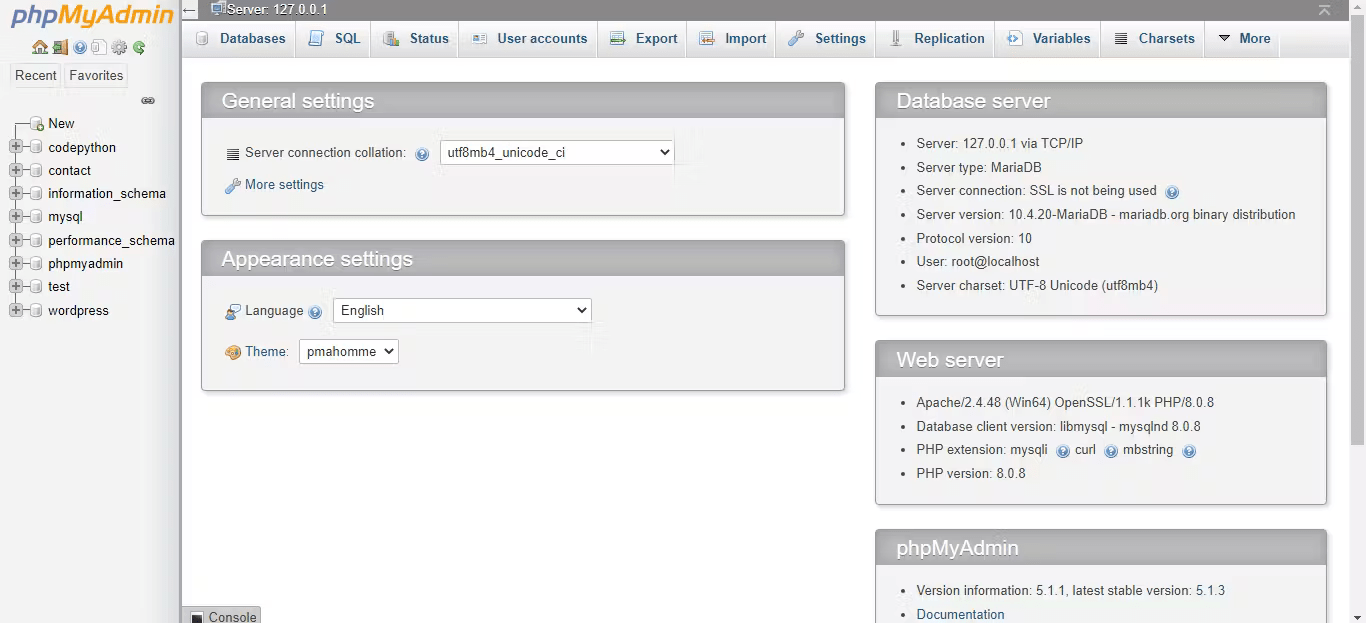
Now head on to your browser and type
|
1 |
http://localhost/phpmyadmin/ |
It may be different for macOS users, try the link below
|
1 |
http://127.0.0.1/phpmyadmin/ |
You’ll see a dashboard like shown below but it might be empty if you are new else there will be a bunch of projects.
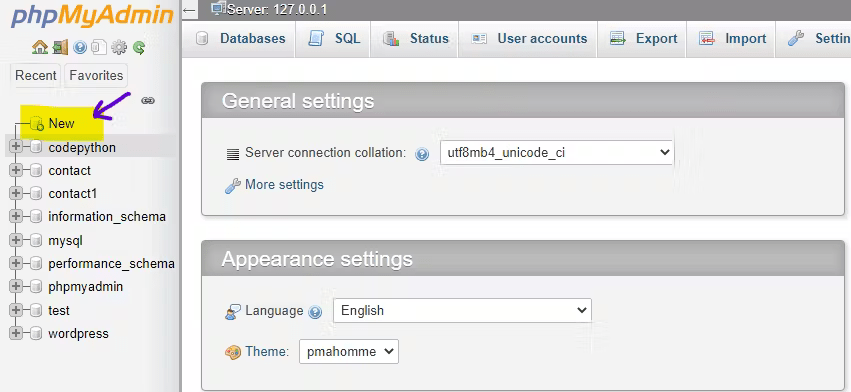
Step 2: Creating Database
We are going to create a MySQL DB. XAMPP provides a simple user interface to create a MySQL database by clicking some keys.
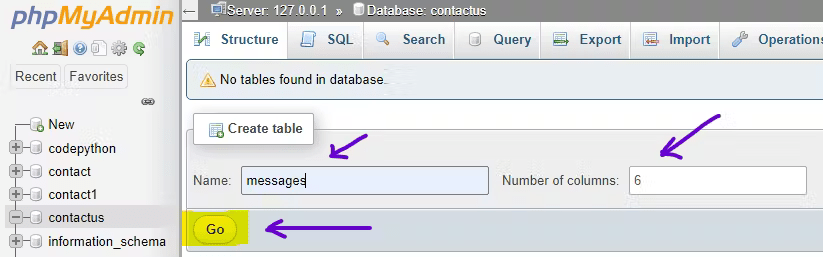
1 – Click on the “New” button to create a new database entry.
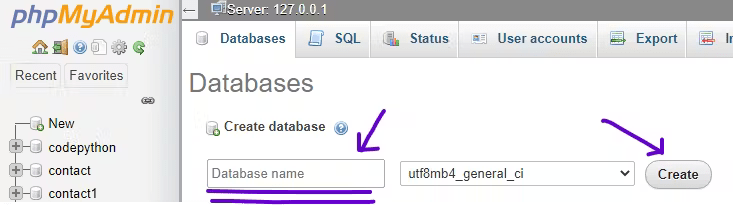
2 – Enter your database name and click on the “Create” button.
3 – Then enter the name of your DB table and enter the number of columns needed. In this case, we need 6 columns.
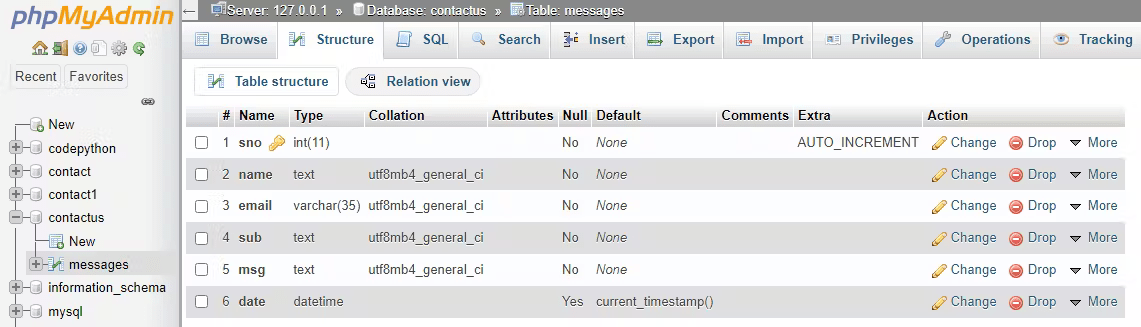
4 – After creating the table, fill in the required fields. Here we’ll create 6 entries
- Serial number – that will be auto increment
- Name
- Subject
- Message
- Date

Note: Length/Values field can be filled with an arbitrary number and set the default value of date to be current_timestamp and set the key of sno to primary.
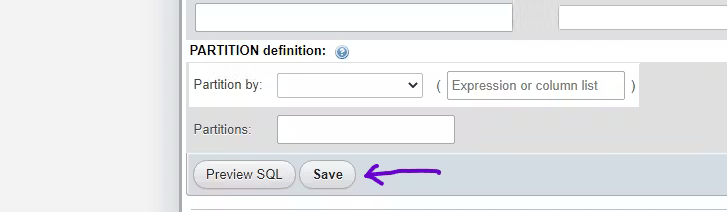
5 – Next, scroll down and save the table.
6 – Your database table structure will look like this.
6. Connecting with DB & saving messages
Step 1: Connecting our Flask app with DB
First, install the package using this command.
|
1 |
pip install Flask-SQLAlchemy |
To connect our Flask app with the database, we have to use Flask-SQLAlchemy. It’s a matter of three lines of code to add to our existing code.
|
1 2 3 4 5 6 |
from flask_sqlalchemy import SQLAlchemy # Configuring DB URI app.config['SQLALCHEMY_DATABASE_URI'] = "mysql://<username>:<password>@geekpython.in/<db_name>" db = SQLAlchemy(app) |
If you haven’t set your username and password then your username will be “root” and the password will be blank.
|
1 |
app.config['SQLALCHEMY_DATABASE_URI'] = "mysql://root:@geekpython.in/<db_name>" |
After configuring our database URI, we created the SQLAlchemy object by passing it the app.
Step 2: Declaring models
To create models, we have to use the Model class from SQLAlchemy and specify the column’s name exactly the same as we created in our database.
Here, Messages is our database table name.
|
1 2 3 4 5 6 7 |
class Messages(db.Model): sno = db.Column(db.Integer, primary_key=True) name = db.Column(db.String(20), nullable=False) email = db.Column(db.String(35), nullable=False) sub = db.Column(db.String(50), nullable=False) msg = db.Column(db.String(1200), nullable=False) date = db.Column(db.String(12), nullable=True) |
After creating the model, we need to make our form to POST the data from the client side.
Step 3: Making our form to POST the data to the database
To make our form perform a POST request to the database, we need the request class from the flask.
|
1 |
from flask import request |
|
1 2 3 4 5 6 7 8 9 |
# App route @app.route("/", methods = ['GET', 'POST']) def contact(): if request.method == 'POST': # Getting data from the form name = request.form.get('name') email = request.form.get('email') subject = request.form.get('subject') message = request.form.get('message') |
First, we specified GET and POST methods to our app route to make it eligible to “get” and “post” the data.
Then inside our function, we declared a conditional statement where if the request.method is equal to “POST” then get the data from the form.
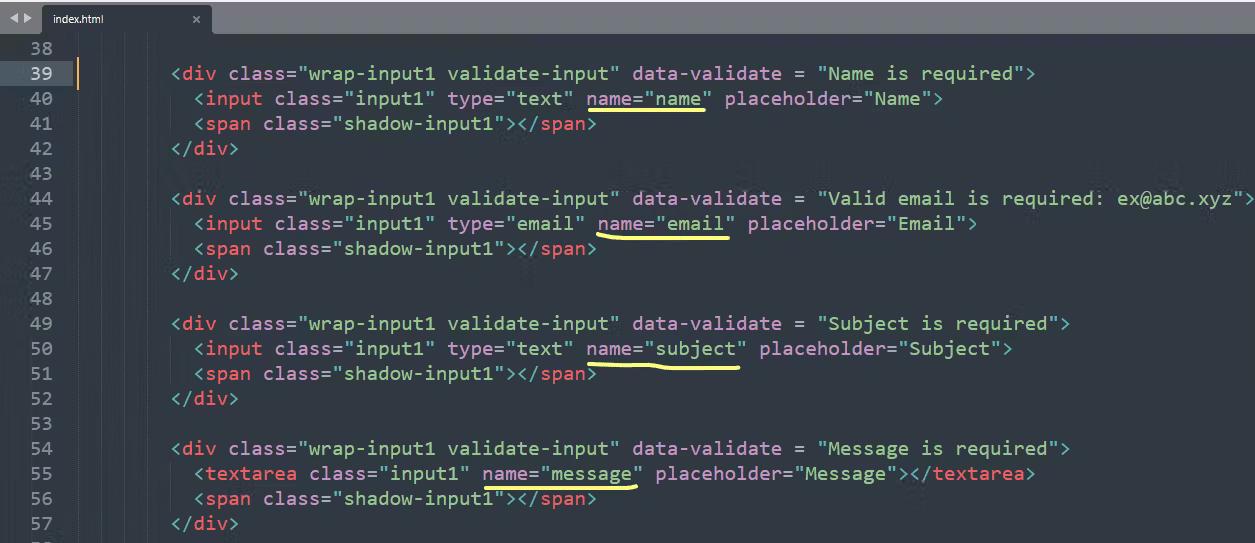
Note: Check all the input fields in your HTML file containing name="name", name="email", name="subject" and name="message" and set the method="post" and action="/" in your form tag. If not then specify them.

Cool, we are ready to commit the entries to the database.
Step 4: Committing to the database
Before committing, we have to add our model entries to the database by using db.session.add() method and then commit by using db.session.commit() method.
|
1 2 3 4 |
# Adding entries to the DB and committing entry = Messages(name=name, email=email, sub=subject, msg=message, date=datetime.datetime.now()) db.session.add(entry) db.session.commit() |
We are setting our model entry values equal to the form data values. Import the datetime module to avoid the error as we used it to set the value of date.
Till now the whole code looks like as shown below
|
1 2 3 4 5 6 7 8 9 10 11 12 13 14 15 16 17 18 19 20 21 22 23 24 25 26 27 28 29 30 31 32 33 34 35 36 37 38 39 |
import datetime from flask import Flask, render_template, request from flask_sqlalchemy import SQLAlchemy app = Flask(__name__) # Configuring DB URI app.config['SQLALCHEMY_DATABASE_URI'] = "mysql://root:@geekpython.in/contactus" db = SQLAlchemy(app) class Messages(db.Model): sno = db.Column(db.Integer, primary_key=True) name = db.Column(db.String(20), nullable=False) email = db.Column(db.String(35), nullable=False) sub = db.Column(db.String(50), nullable=False) msg = db.Column(db.String(1200), nullable=False) date = db.Column(db.String(12), nullable=True) # App route @app.route("/", methods = ['GET', 'POST']) def contact(): if request.method == 'POST': # Getting data from the form name = request.form.get('name') email = request.form.get('email') subject = request.form.get('subject') message = request.form.get('message') # Adding entries to the DB and committing entry = Messages(name=name, email=email, sub=subject, msg=message, date=datetime.datetime.now()) db.session.add(entry) db.session.commit() # Rendering template return render_template("index.html") if __name__=="__main__": app.run(debug=True) |
Users can send messages and we can see them in the database.
Cool, we are almost there to complete our contact form. Now we have to get the messages from users in our email account.
7. Getting Email
In this step, we have to provide our email username and password and we cannot write them in our code due to security reasons so we gonna create environment variables.
Step 1: Creating environment variables
Create a file called the .env in your project directory and store your email username and password inside it.
|
1 2 |
GMAIL_USERNAME = youremail@something.com GMAIL_PASSWORD = youremailpassword |
Step 2: Loading the values in our app
To get the values from the .env file inside our app, we have to use the os module from Python.
|
1 2 3 4 5 |
import os # Getting environment variables gmail_user = os.getenv('GMAIL_USERNAME') gmail_pass = os.getenv('GMAIL_PASSWORD') |
We used the os.getenv() method to get the values.
Step 3: Getting emails from users
We gonna use Flask-Mail. To use it first install the package and then import it inside our app.
|
1 |
pip install Flask-Mail |
Import the package
|
1 |
from flask_mail import Mail |
Then we have to configure server parameters.
|
1 2 3 4 5 6 7 8 |
# Configuring values app.config.update( MAIL_SERVER = "smtp.gmail.com", MAIL_PORT = '465', MAIL_USE_SSL = True, MAIL_USERNAME = gmail_user, MAIL_PASSWORD = gmail_pass, ) |
We used this method because using this method we can easily update multiple parameters at once.
We can configure server parameters one by one using the method written below
|
1 2 3 4 5 6 |
app.config['MAIL_SERVER']='smtp.gmail.com' app.config['MAIL_PORT'] = 465 app.config['MAIL_USERNAME'] = 'yourId@gmail.com' app.config['MAIL_PASSWORD'] = '*****' app.config['MAIL_USE_TLS'] = False app.config['MAIL_USE_SSL'] = True |
Note: You can use either of the methods to configure server parameters.
We are using a Gmail account. If you want to use another email service then just change the “mail-server” name and “mail port” number.
Flask-Mail is configured through the standard Flask config API. These are the available options:
- MAIL_SERVER : default ‘localhost’
- MAIL_PORT : default 25
- MAIL_USE_TLS : default False
- MAIL_USE_SSL : default False
- MAIL_DEBUG : default app.debug
- MAIL_USERNAME : default None
- MAIL_PASSWORD : default None
- MAIL_DEFAULT_SENDER : default None
- MAIL_MAX_EMAILS : default None
- MAIL_SUPPRESS_SEND : default app.testing
- MAIL_ASCII_ATTACHMENTS : default False Source
Then we have to create a Mail instance and pass our app to it.
|
1 2 |
# Instantiate Mail mail = Mail(app) |
In the last step, we gonna use the send_message() method inside our contact function to get the message.
|
1 2 3 4 5 6 |
# Sending message to gmail mail.send_message("Message from " + name + " at " + email, sender = email, recipients = [gmail_user], body = subject + "\n\n" + message ) |
Note: Recipients will be the list of email accounts but in this case, we are the only recipient here.
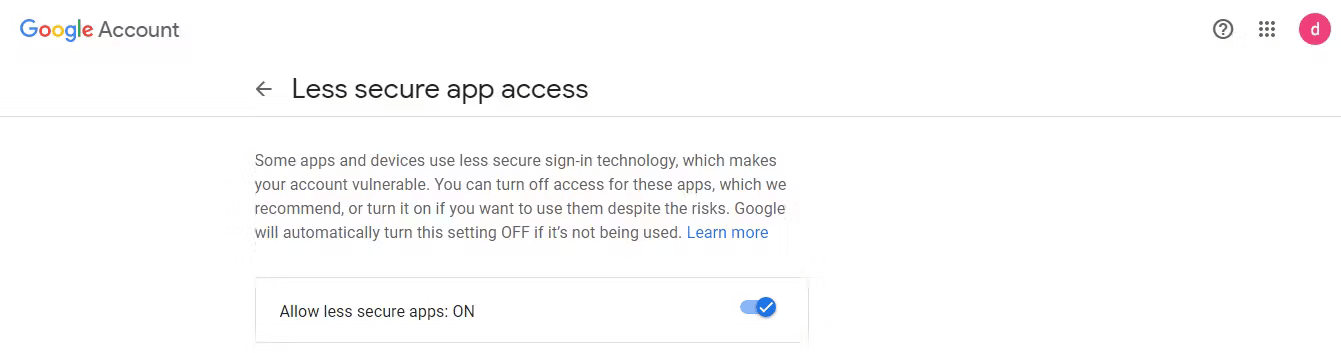
One last thing, just go to your Google account setting and enable the “less secure apps” option because Google doesn’t allow third-party apps to manipulate or “sign-in” to your account.
Now, you are good to run the Flask app and test the contact page.
Conclusion
Our Flask app is now finally completed and we’ve learned so many things through this long tutorial.
Through this Contact Page, users can now interact with you and they can send their appreciation, doubts, and much more.
You can edit/modify the code to make this app more interactive or add more features.
Head over to Github and get the source code – GitHub
That’s all for now
Keep Coding✌✌

