

Redis is an in-memory database that actually makes it the fastest among all the databases.
What does “in-memory” mean? It means that it stores the data in temporary memory or RAM, in the form of key-value pairs. This makes it perfect for serving results instantly.
In this article, you’ll learn how to install Redis locally on Windows without any hassle.
Installation Process Begins
You probably don’t know that Redis isn’t officially available for Windows yet, but there is a way that you can install Redis locally on Windows and get started with it.
Redis is available for MacOS, Linux but for Windows, they say:
Redis is not officially supported on Windows. However, you can install Redis on Windows for development.
So, how to install it then? Simple, actually not simple in my opinion but I will guide you step by step installing Redis on your Windows machine.
Enable WSL on Windows
To install Redis on Windows, you need to enable WSL (Windows Subsystem for Linux). It simply means that you need to install Linux on your Windows system.
To enable WSL, you must be running Windows 10 version 2004 and higher (Build 19041 and higher) or Windows 11.
You can enable the WSL2 (WSL version 2) by default with a single command.
Open Powershell in administrator mode and run the following command.
|
1 |
wsl --install |
This command will enable the features necessary to run WSL and install the Ubuntu distribution of Linux.
You can change or install another distribution of Linux if you want to, just use the following command.
|
1 |
wsl --install -d <Distribution Name> |
You can replace <Distribution Name> with the actual Linux distribution you want to install on the Windows machine. But, I would recommend keeping the default settings.
After all this installation process, restart your Windows machine once to see the changes.
If your Windows machine is a bit older and WSL2 is not supported then check out this guide from Microsoft itself to manually enable WSL on Windows.
Troubleshooting Error
There will be less chance that you will get errors while setting up WSL but in case you encounter any error such as “failed to register wsl distribution” or something like that then consider changing the WSL version.
Run the following command in Powershell in administrator mode to change the version of your WSL.
|
1 |
wsl --set-default-version 1 |
This command will change the default version which is WSL2 to WSL1. This will solve most of the problems.
Now, restart your Windows machine again to see the effect.
Set Up Linux
After enabling WSL and installing Linux distribution, you need to set up user info for Linux.
Open Ubuntu or whichever distribution you installed and give it a few minutes to install. After that, it will ask you to enter a username for Linux and set a password.

After setting up the Linux distribution, the next step is to install Redis.
Install Redis on Windows
Redis can be installed on Windows using the following commands
|
1 2 3 4 5 6 |
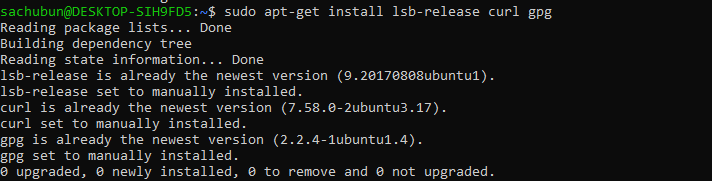
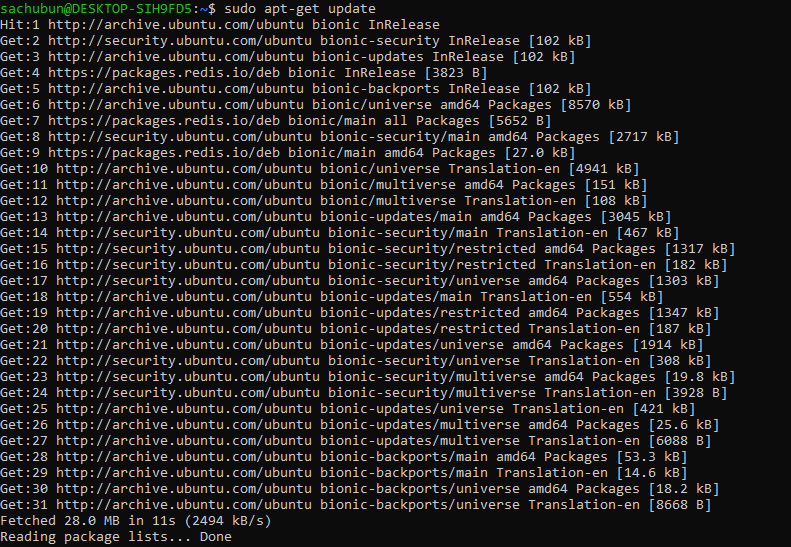
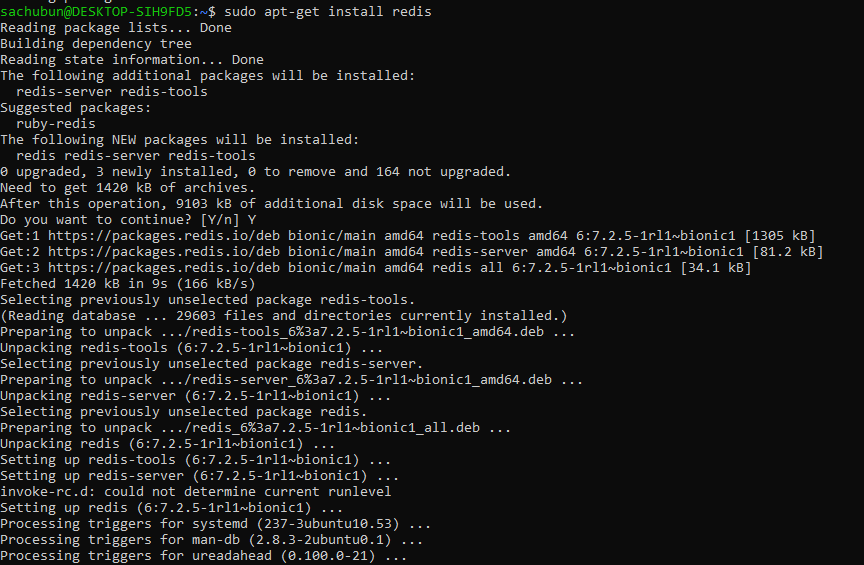
curl -fsSL https://packages.redis.io/gpg | sudo gpg --dearmor -o /usr/share/keyrings/redis-archive-keyring.gpg echo "deb [signed-by=/usr/share/keyrings/redis-archive-keyring.gpg] https://packages.redis.io/deb $(lsb_release -cs) main" | sudo tee /etc/apt/sources.list.d/redis.list sudo apt-get update sudo apt-get install redis |
Copy the above commands all together and paste them into the Ubuntu terminal, this will start the process of installing Redis on Windows locally.

Start Redis
Now run the following command to start the Redis server.
|
1 |
sudo service redis-server start |

Now to check if you’re connected to Redis, run the following command.
|
1 |
redis-cli |

Redis server started on localhost and listening on port 6379 which is its default port.
That’s all for now.
Keep Coding✌✌


