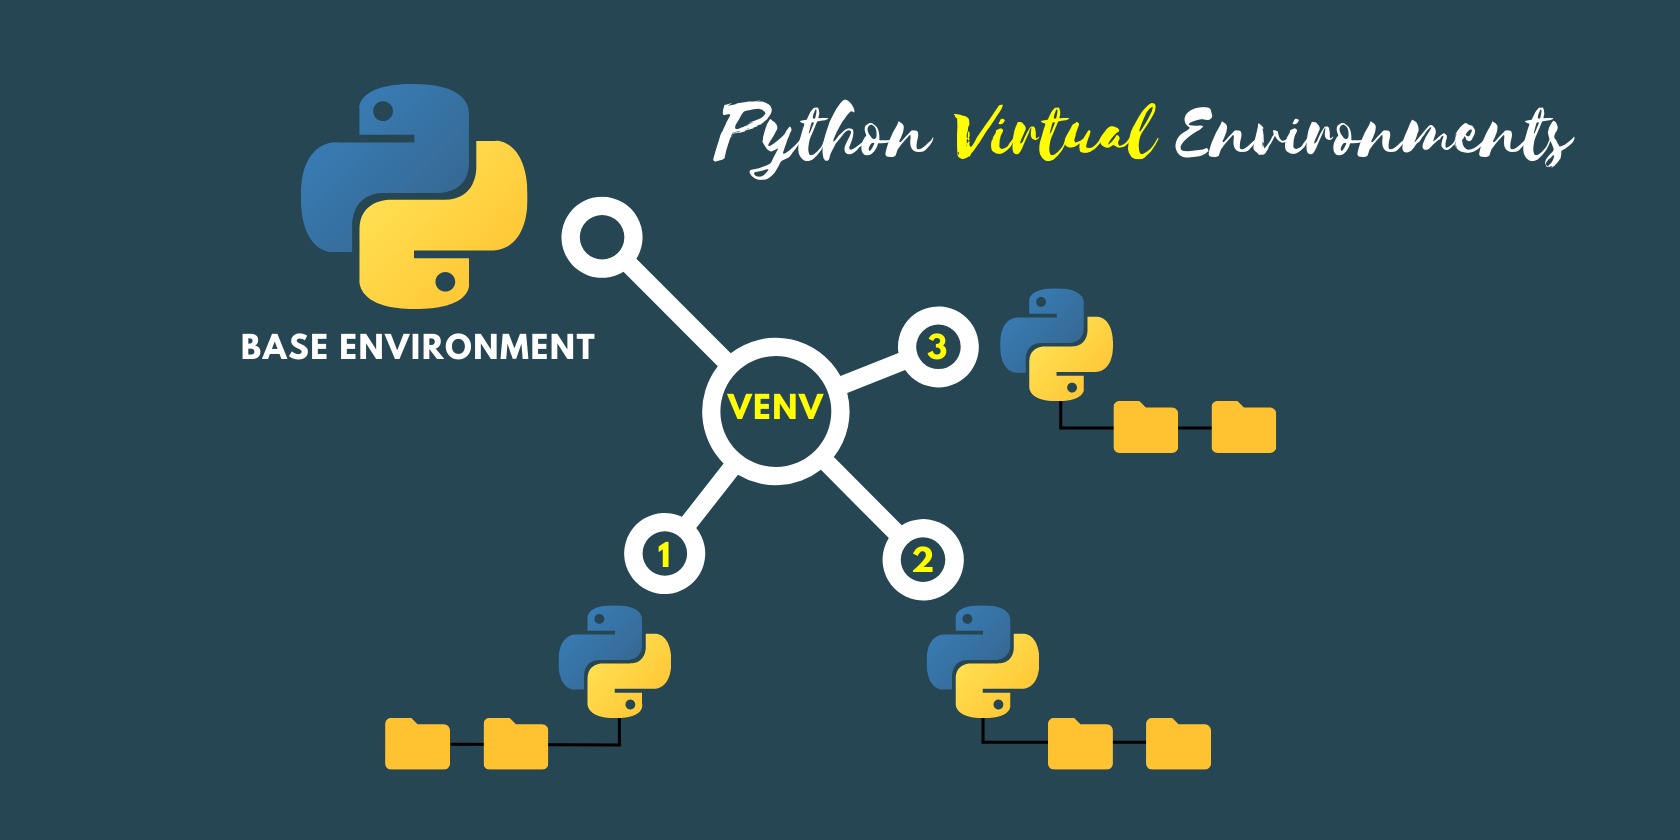
Have you ever needed an isolated environment apart from your primary Python environment to manage the different versions of dependencies for your project?
That is where the virtual environment comes into play.
A virtual environment is a tool used to manage the dependencies required by the different projects separately by creating isolated virtual environments for them. This is used by most Python developers often.
In this tutorial, we’ll learn how to use Python’s venv module to create and manage the virtual environments for our project separately. Each environment created will be capable of managing different versions of the dependency and Python versions too.
In the last, we’ll also see other options like virtualenv and conda to create virtual environments.
What is a virtual environment?
Well, till now, you’ve got a pretty good idea of a virtual environment.
A virtual environment is a self-contained directory tree containing the specific Python version installed and some additional third-party applications.
Why do we need a virtual environment?
Why do we use a virtual environment when we don’t know why we need it?
Suppose you are working on two Python projects based on web scraping. Let’s say application_X and application_Y where application_X uses beautifulsoup4=4.11.1 and application_Y uses beautifulsoup4=4.10.0. In this situation, the dependencies will conflict, and installing either version 4.11.1 or 4.10.0 will leave one of the applications unable to run.
For such situations, virtual environments can be very helpful in managing the different dependencies for both projects.
It is a good practice to use virtual environments for your project so that your project doesn’t conflict with one another regarding dependencies and the Python version.
How does a virtual environment work?
By default, the external packages we install using pip in our Python base environment rest inside a folder called site-packages/
|
1 2 3 4 5 6 7 8 9 10 11 12 13 14 15 16 |
. └── Python/ ├── include ├── Lib/ │ └── site-packages/ │ ├── asgiref-3.5.2.dist-info │ ├── beautifulsoup4-4.11.1.dist-info │ ├── certifi-2022.6.15.dist-info │ ├── Django-4.0.6.dist-info │ ├── django │ ├── Flask-2.1.2.dist-info │ └── flask ├── libs ├── Scripts ├── tcl └── Tools |
When we create a virtual environment using venv, it re-creates the file and folder structure of the standard Python installation on our OS.
Python also copies the folder structure or symlinks into that folder, the Python executable with which we’ve created our virtual environment.
A symlink is a symbolic link that points to another file and folder in our computer or a connected file system. So basically, when we create our virtual environment, that virtual environment points to the file and folder of the standard Python installation to create its own environment.
The folder structure looks like this when we create our virtual environment.
|
1 2 3 4 5 6 7 8 9 10 11 12 13 14 15 16 17 18 19 20 21 22 23 24 |
D: │ pyvenv.cfg │ ├───Include ├───Lib │ └───site-packages │ │ distutils-precedence.pth │ ├───pip │ ├───pip-22.0.4.dist-info │ ├───pkg_resources │ ├───setuptools │ ├───setuptools-58.1.0.dist-info │ └───_distutils_hack │ └───Scripts activate activate.bat Activate.ps1 deactivate.bat pip.exe pip3.10.exe pip3.exe python.exe pythonw.exe |
To list the directory tree, follow the steps below:
- cd into the virtual environment directory in your terminal.
|
1 |
PS> cd your/virtual/environment/dir |
- Then run the following command in your terminal
|
1 |
PS> tree /F |
The above command will generate a directory tree with all the files. However, the tree generated by this command will be very long.
Setting up a virtual environment
Remember our two applications, application_X, and application_Y, both use different versions of Beautiful Soup v4.11.1 and v4.10.0, respectively. If we try to install v4.10.0 for application_Y and then try to install v4.11.1 for application_X globally then v4.10.0 will be overwritten.
|
1 2 3 4 5 6 |
PS> python -m pip install beautifulsoup4==4.10.0 PS> python -m pip list Package Version ------------------ ----------- beautifulsoup4 4.10.0 |
|
1 2 3 4 5 6 |
PS> python -m pip install beautifulsoup4==4.11.1 PS> python -m pip list Package Version ------------------ ----------- beautifulsoup4 4.11.1 |
But this won’t be a problem with the virtual environment if we create it for both of the applications.
Creating a virtual environment
To create a virtual environment, we’ll use Python’s venv module.
|
1 |
PS> python -m venv my_venv |
Like the above command, we can create two separate virtual environments for our application_X and application_Y.
Creating multiple virtual environments at once
|
1 |
PS> python -m venv application_X application_Y |
The above command will create two separate virtual environments in the same directory. We can also specify different paths for our virtual environments.
|
1 |
PS> python -m venv application_X your/full/path/to/directory/application_Y |
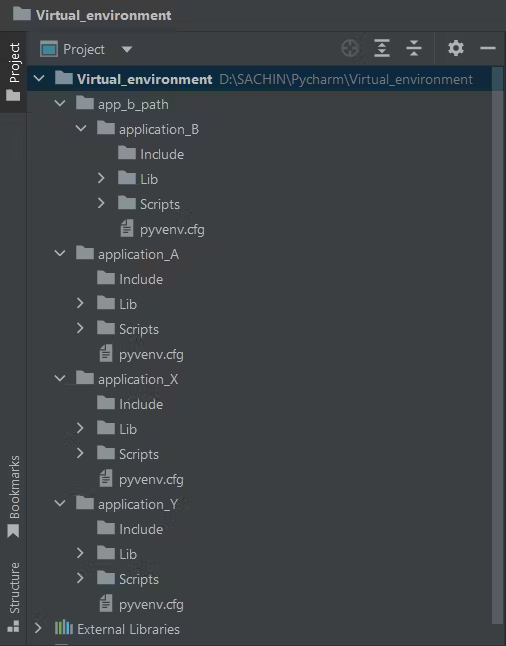
For example, I am creating an application_A in the root directory and another application in the sub-directory named app_b_path.
Then the command will be –
|
1 |
PS> python -m venv application_A D:\SACHIN\Pycharm\Virtual_environment\app_b_path\application_B |
Please look at the folder structure of the virtual environments we have created.

Activating a virtual environment
Great, our application has its virtual environment, but to start using it first, we must activate it.
The simple command for activating any virtual environment is to execute a script that comes with the installation.
|
1 2 3 |
PS> Scripts\activate (application_A) PS> |
Note: Before executing the above command, make sure to change the directory to the virtual environment.
Or we can run the command <virtual_environment_directory/Scripts/activate\> from the root directory.
|
1 2 3 |
PS> application_X\Scripts\activate (application_X) PS> |
Installing packages into it
Now that we have created two separate virtual environments for our application_X and application_Y, we can install the external dependencies we need for our project.
Activating application_X and installing v4.11.1 of beautifulsoup4
|
1 2 3 4 5 6 7 8 9 10 11 12 |
PS> application_X\Scripts\activate (application_X) PS> pip install beautifulsoup4==4.11.1 (application_X) PS> pip list Package Version -------------- ----------- beautifulsoup4 4.11.1 pip 22.0.4 setuptools 58.1.0 soupsieve 2.3.2 |
Activating application_Y and installing v4.10.0 of beautifulsoup4
|
1 2 3 4 5 6 7 8 9 10 11 12 |
PS> application_Y\Scripts\activate (application_Y) PS> pip install beautifulsoup4==4.10.0 (application_Y) PS> pip list Package Version -------------- ----------- beautifulsoup4 4.10.0 pip 22.0.4 setuptools 58.1.0 soupsieve 2.3.2 |
We used pip to install the dependency just like we do globally in our standard Python Installation. Since we created and activated the virtual environments, pip will install the dependency in an isolated location.
Now you can understand how we can manage different versions of dependencies and avoid system pollution or conflict between external packages.
Deactivate the virtual environment
Once you are done with the virtual environment, you must deactivate it.
|
1 2 3 |
(application_Y) PS> deactivate PS> |
After running the deactivate command, your command prompt will return to its normal state. It means that you’ve successfully exited your virtual environment, and if you continue using Python or pip in your command prompt, you’ll directly interact with globally installed Python.
Other popular options
Python’s venv module is a great tool to work with virtual environments, and its main advantage is that it comes preinstalled with Python. But there are other popular options also available.
- Virtualenv
- Conda
Virtualenv
It is a tool for creating isolated Python environments. Virtualenv allows some great features that a typical in-built venv module doesn’t provide.
- Speed matters. It creates a virtual environment more quickly.
- Automatically discovers the installed Python version.
- Tools can be upgraded using
pip
Installing the virtualenv package globally
|
1 |
PS> pip install virtualenv |
Creating a virtual environment using virtualenv and activating it
|
1 2 3 4 5 6 7 |
PS> virtualenv my_virtualenv PS> ls Mode LastWrite Time Length Name ---- ---------- --- ------ ---- d----- 8/4/2022 6:07 PM my_virtualenv |
|
1 2 3 |
PS> my_virtualenv/Scripts/activate (my_virtualenv) PS> |
If the virtual environment doesn’t activate, try changing your system’s Execution Policy.
For Windows PowerShell
|
1 |
PS> Set-ExecutionPolicy Unrestricted -Scope Process |
This command will remove the restriction for the current process.
Conda
Conda is an open-source package and environment management system that runs on Windows, macOS, and Linux. It comes with Anaconda Python Distribution. It was created primarily for Python programs but later extended support for most programming languages.
We can also set conda in our system using the Miniconda installer, which provides a minimal running requirement for conda on our system.
Conda easily creates, saves, loads, and switches between environments on our local computer.
After downloading Anaconda or Miniconda, follow the further steps.
Anaconda comes with its own PowerShell Prompt called Anaconda PowerShell Prompt and we are going to use it to create and activate virtual environments using conda.
Creating a virtual environment using conda
|
1 |
(base) PS> conda create -n virtualconda |
Note: If you use Windows PowerShell to create virtual environments using conda, you might encounter some errors. So try to add your Anaconda installation to the PATH.
Activating our virtualconda environment
|
1 2 3 |
(base) PS> conda activate virtualconda (virtualconda) PS> |
Installing packages
We were using pip to install external packages but in this case, we have to use conda.
|
1 |
(virtualconda) PS> conda install pandas |
All the necessary packages will be installed along with Python (the same version as on your system) and pandas.
Deactivating our virtualconda environment
After finishing work with the virtual environment, deactivate it.
|
1 2 3 |
(virtualconda) PS> conda deactivate (base) PS> |
The virtual environments are stored inside the envs folder inside the Anaconda installation path.
Conclusion
We created many virtual environments throughout this tutorial using different packages and in-built modules.
We now understand the use of virtual environments for our projects, and how helpful they can be for managing the different projects with dependencies of different versions separately. It is good practice to have an isolated environment to avoid conflicts and system pollution.
We’ve built a thorough understanding of the virtual environments and now we can use them for our projects without a second thought.
🏆Other articles you might be interested in if you liked this one
✅Comparing the list reverse and reversed functions.
✅8 different ways to reverse a Python list.
✅NumPy argmax() and TensorFlow argmax() – Are they similar?
✅Execute your code dynamically using the exec() in Python.
✅Perform high-level file operations on files in Python.
✅Number your iterable data using the enumerate() in Python.
✅Understanding args and kwargs in function parameters in Python.
That’s all for now
Keep Coding✌✌


