
TailwindCSS is a utility-first CSS framework for rapidly creating custom user interfaces. The main advantage of using TailwindCSS is that it is a highly customizable, low-level CSS framework and lets the user take full control of it.
It is a utility-first CSS framework which means that it provides utility classes to build custom designs without writing CSS as we do it traditionally. It puts an end to the use of weird names for CSS classes and IDs.
In this article, we’ll learn how to merge the TailwindCSS into our Flask app.
Building a flask app
Installing Flask
Before creating a flask app, we’ll begin the installation first. Open up your terminal and run the following command.
|
1 |
pip install flask |
Creating the Flask server
Next, we’ll lay the pipeline for creating the flask server. Start by creating a folder in which we’ll put our files then inside that folder create an app.py file.
Then, we’ll create a subfolder called templates in which we’ll store our HTML files and then create another subfolder called static which will be holding styles, scripts, and static images for our frontend.
|
1 2 3 4 |
flask_folder/ ├── app.py ├── static └── templates |
In our app.py file we’ll add the following code to create a flask server
|
1 2 3 4 5 6 7 8 9 10 11 12 |
from flask import Flask, render_template app = Flask(__name__) @app.route("/") def index(): return render_template("index.html") if __name__ == '__main__': app.run(debug=True) |
The above code will create a simple flask server with a route that will be responsible for displaying the webpage from the index.html file which we haven’t created yet.
Add a new file called index.html inside the templates subfolder.
In our index.html file add the following HTML
|
1 2 3 4 5 6 7 8 9 10 |
<!DOCTYPE html> <html lang="en"> <head> <meta charset="UTF-8"> <title>Title</title> </head> <body> <h1>Hi, there!!</h1> </body> </html> |
Let’s start our server by running the following command in our terminal
|
1 |
python app.py |
This will start our development server and we can see our webpage serving on http://127.0.0.1:5000.

Adding TailwindCSS into the flask
We’ll now perform the following steps to merge the CSS framework(TailwindCSS) into our flask app.
Installing TailwindCSS
We can use either npm or yarn to install the dependency in our project folder. Run the following command in the terminal for installing TailwindCSS using npm and yarn respectively.
|
1 |
npm install tailwindcss |
OR
|
1 |
yarn add tailwindcss |
I am using npm for this tutorial.
After running the command, the installation will begin and the following files will be created in the root directory.
|
1 2 3 4 |
flask_folder/ ├── node_modules/ ├── package.json └── package-lock.json |
Creating a configuration file
Run the following command in the terminal to create a configuration file.
|
1 |
npx tailwindcss init |
The command will create a minimal tailwind.config.js file at the root of the project.
|
1 2 3 4 5 6 7 |
module.exports = { content: [], theme: { extend: {}, }, plugins: [], } |
We need to do some modifications to the content section of the tailwind.config.js to configure the paths to all of your HTML templates.
|
1 2 3 4 5 6 7 8 |
module.exports = { mode: 'jit', content: ["./templates/**/*.{html,htm}"], theme: { extend: {}, }, plugins: [], } |
We just added the templates folder where all the HTML files will go and used the glob pattern which makes it easy to match all of the content files in the project.
- Use
*to match anything except slashes and hidden files - Use
**to match zero or more directories - Use comma separate values between {} to match against a list of options
Additionally, we enabled the jit (just-in-time) mode since the JIT mode generates the CSS on-demand by scanning the template files.
Creating CSS files and adding tailwind directives
Inside the static folder, create two CSS folders named src and css and inside these folders add input.css and main.css files respectively.
|
1 2 3 4 5 6 |
flask_folder/ └── static/ ├── css/ │ └── main.css └── src/ └── input.css |
Now, add the following code inside the src/input.css file to insert Tailwind’s base, components, and utilities styles into the CSS.
src/input.css file
|
1 2 3 |
@tailwind base; @tailwind components; @tailwind utilities; |
Starting the build process
To generate the CSS from the preprocessor directives, we need to run the following command in the terminal.
|
1 |
npx tailwindcss -i ./static/src/input.css -o ./static/css/main.css --watch |
Note: We will have to run the above code every time we add CSS to our HTML files to see the changes. So the best practice would be to make the above command a script, that will rebuild the CSS without the need to run the CSS build process code every time.
In the package.json file add the scripts
|
1 2 3 4 5 6 7 8 9 |
{ "dependencies": { "tailwindcss": "^3.1.8" }, "scripts": { "create-css": "npx tailwindcss -i ./static/src/input.css -o ./static/css/main.css --watch" } } |
Now, run the script create-css in the terminal
|
1 |
npm run create-css |
The above command will eliminate the need to run the CSS build process every time after changing the code inside the HTML file.
Creating frontend with TailwindCSS
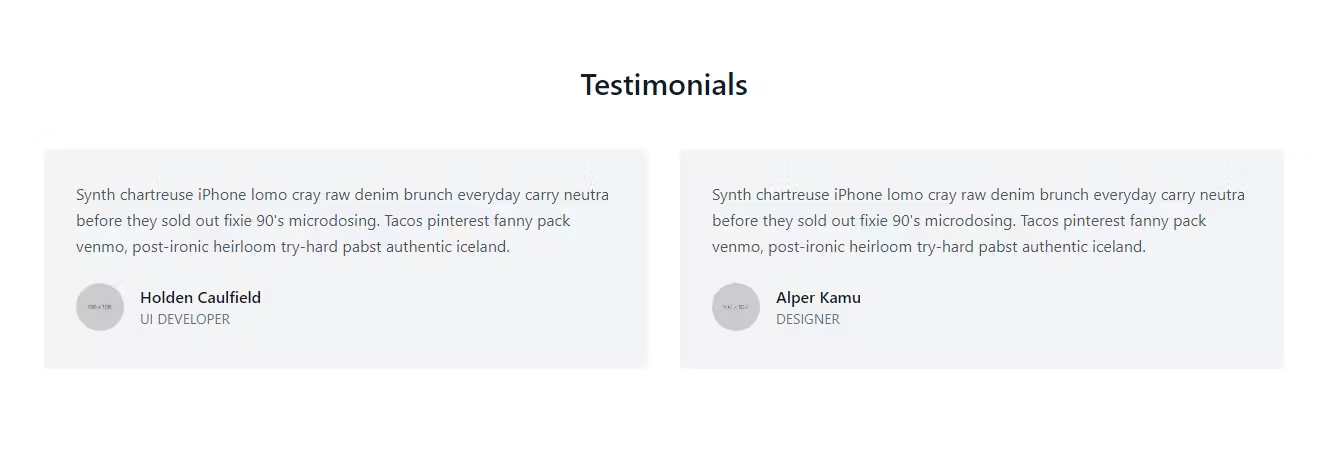
Now, to test if it is working, use the utility classes of the TailwindCSS to style the templates. Head over to the templates/index.html and edit the file.
Link the css/main.css file in the Head tag inside the index.html.
|
1 |
<link href="{{url_for('static',filename='css/main.css')}}" rel="stylesheet"> |
templates/index.html
|
1 2 3 4 5 6 7 8 9 10 11 12 13 14 15 16 17 18 19 20 21 22 23 24 25 26 27 28 29 30 31 32 33 34 35 36 37 38 39 40 41 42 43 |
<!DOCTYPE html> <html lang="en"> <head> <meta charset="UTF-8"> <meta content="width=device-width, initial-scale=1.0" name="viewport"> <title>Merge TailwindCSS into Flask app</title> <link href="{{url_for('static',filename='css/main.css')}}" rel="stylesheet"> </head> <body> <section class="text-gray-600 body-font"> <div class="container px-5 py-24 mx-auto"> <h1 class="text-3xl font-medium title-font text-gray-900 mb-12 text-center">Testimonials</h1> <div class="flex flex-wrap -m-4"> <div class="p-4 md:w-1/2 w-full"> <div class="h-full bg-gray-100 p-8 rounded"> <p class="leading-relaxed mb-6">Synth chartreuse iPhone lomo cray raw denim brunch everyday carry neutra before they sold out fixie 90's microdosing. Tacos pinterest fanny pack venmo, post-ironic heirloom try-hard pabst authentic iceland.</p> <a class="inline-flex items-center"> <img alt="testimonial" src="https://dummyimage.com/106x106" class="w-12 h-12 rounded-full flex-shrink-0 object-cover object-center"> <span class="flex-grow flex flex-col pl-4"> <span class="title-font font-medium text-gray-900">Holden Caulfield</span> <span class="text-gray-500 text-sm">UI DEVELOPER</span> </span> </a> </div> </div> <div class="p-4 md:w-1/2 w-full"> <div class="h-full bg-gray-100 p-8 rounded"> <p class="leading-relaxed mb-6">Synth chartreuse iPhone lomo cray raw denim brunch everyday carry neutra before they sold out fixie 90's microdosing. Tacos pinterest fanny pack venmo, post-ironic heirloom try-hard pabst authentic iceland.</p> <a class="inline-flex items-center"> <img alt="testimonial" src="https://dummyimage.com/107x107" class="w-12 h-12 rounded-full flex-shrink-0 object-cover object-center"> <span class="flex-grow flex flex-col pl-4"> <span class="title-font font-medium text-gray-900">Alper Kamu</span> <span class="text-gray-500 text-sm">DESIGNER</span> </span> </a> </div> </div> </div> </div> </section> </body> </html> |
Flask app using TailwindCSS
Conclusion
Usually, developers prefer to use Bootstrap to build UI for the frontend, but in this tutorial, we integrated TailwindCSS into our flask app.
We’ve covered the following steps in this tutorial
- Created a demo flask app.
- Installed the TailwindCSS into the project root directory and Configured it.
- Added tailwind directives in the CSS files.
- Ran the command to generate the CSS from the directives.
That’s all for now
Keep Coding✌✌


