
Appwrite is an open-source backend platform that reduces a developer’s effort and time spent building a backend server from scratch. It is a backend-as-a-service solution that handles backend tasks for web, mobile, and Flutter apps.
Appwrite offers databases, authentication, storage, real-time communication, and many other services.
Creating and configuring a database in a web app is time-consuming, and this tutorial will walk you through the process of doing so in simple steps using Appwrite’s Python SDK (Software Development Kit) or package.
If you don’t want to deal with preliminary tasks before setting up the database in the Appwrite cloud, you can skip to the database creation section.
Collecting Required Info
Before you begin creating a database on the Appwrite cloud, you must first obtain the following credentials from the Appwrite console:
- Appwrite API key
- Appwrite Project ID
- Appwrite Cloud API Endpoint
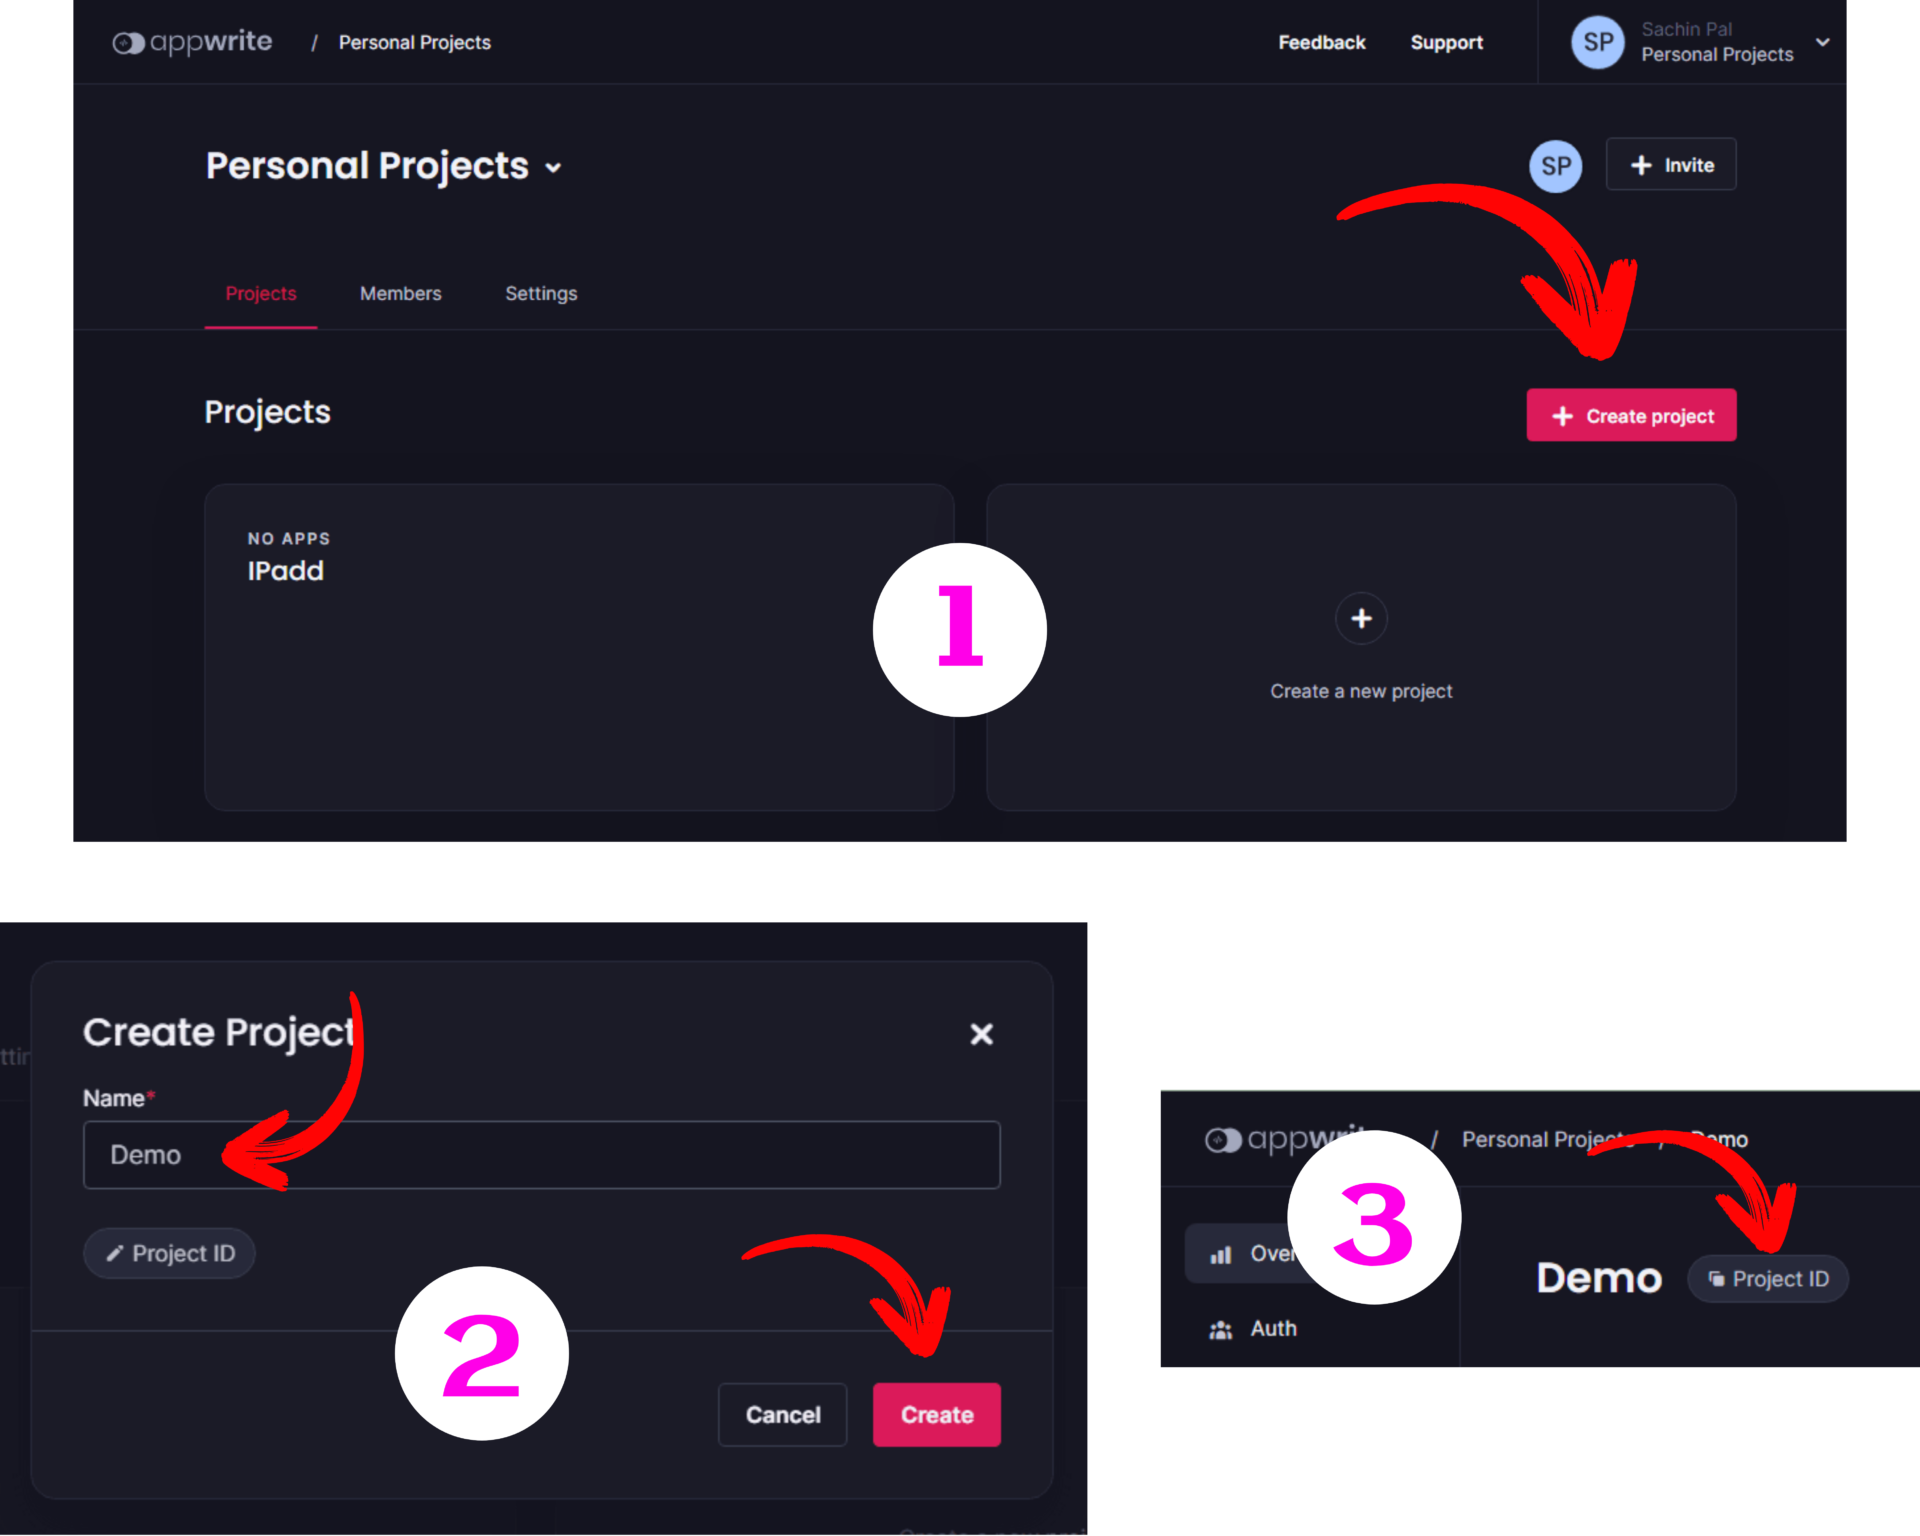
Step 1: Obtaining Project ID
- To gain access to the Appwrite console, create an account on the Appwrite cloud (https://cloud.appwrite.io/) or log in if you already have one.
- Click the “Create project” button, give your project a name, and then save the “Project ID”.
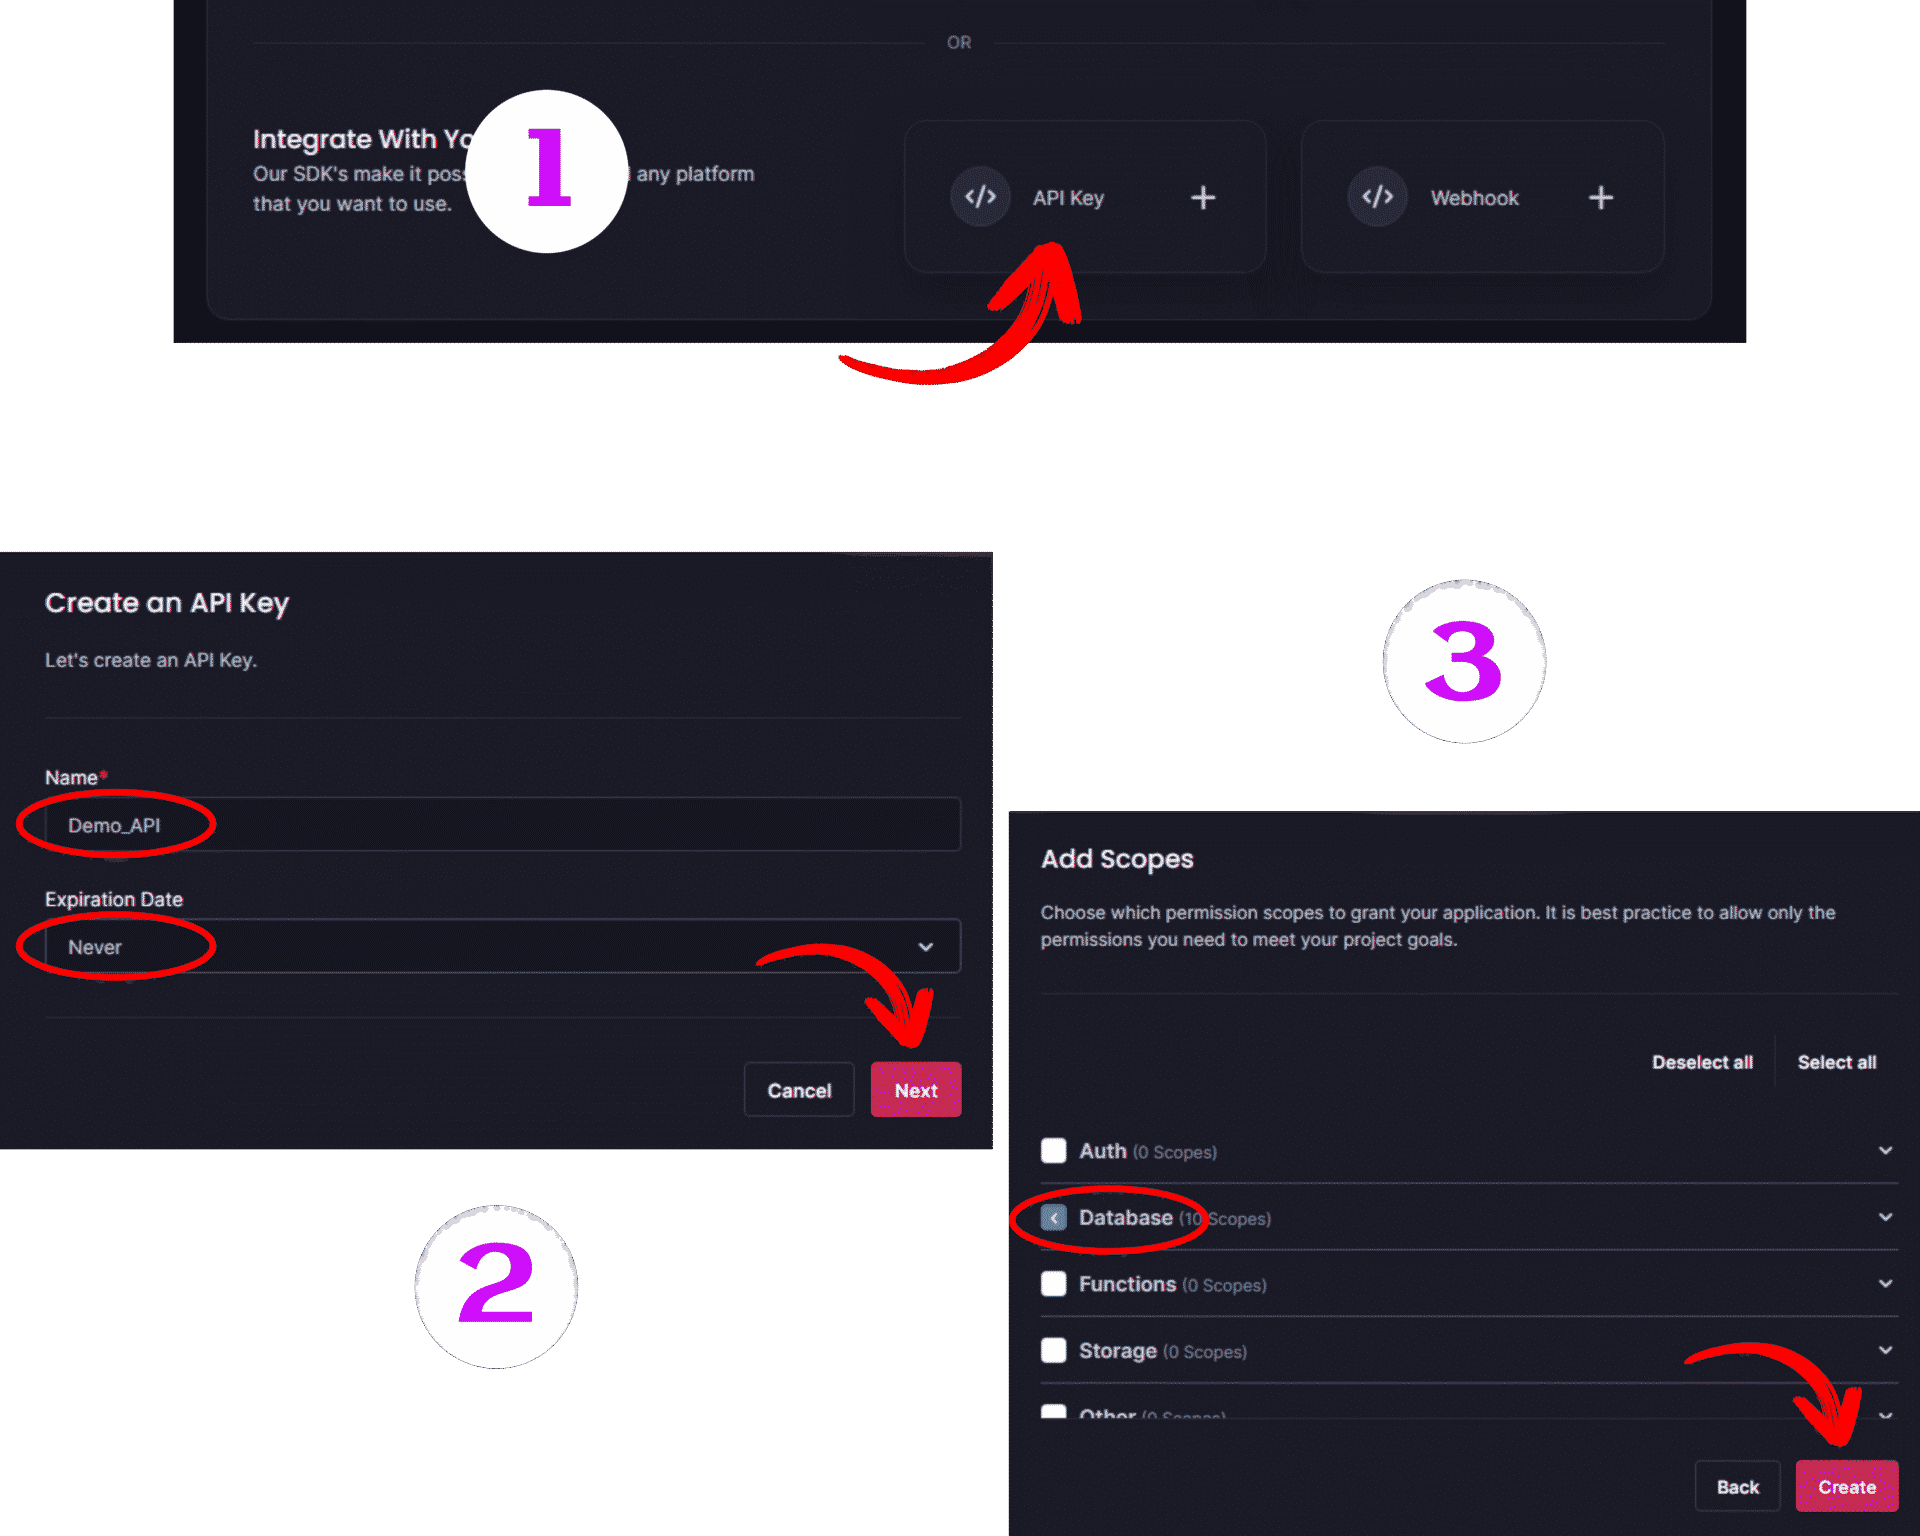
Step 2: Obtaining API Key
- After you’ve created a new project, scroll down and click the “API Key” button.
- Fill in the API name and select the expiration time, then click the “Next” button, then add the scope “Database”, and finally click the “Create” button.
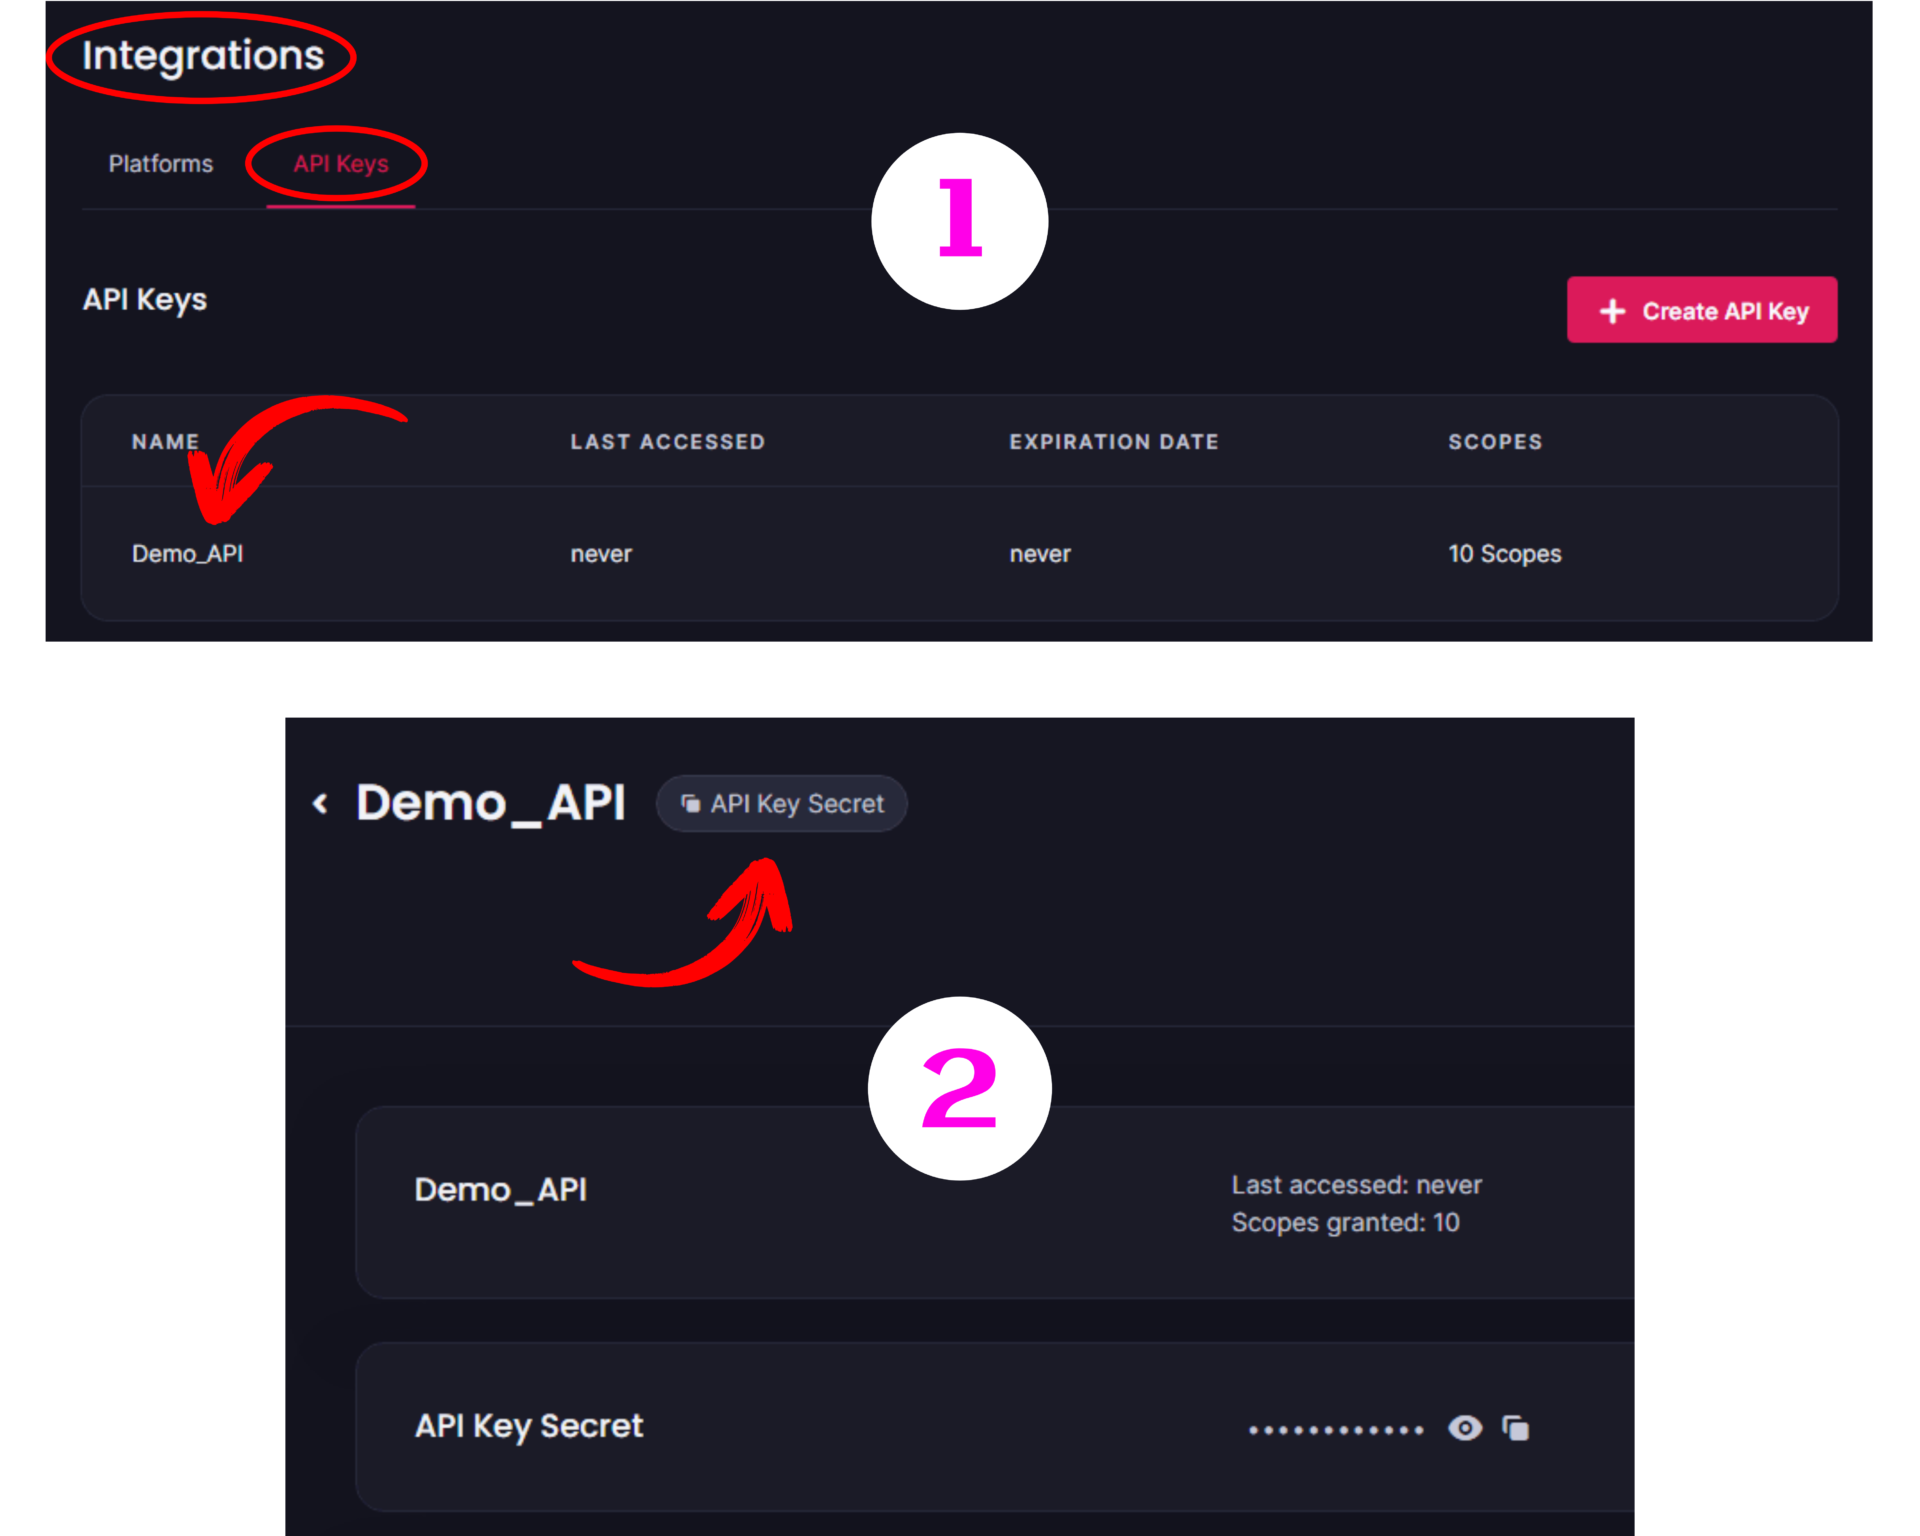
- Scroll down the Appwrite console and click on “API Keys” under the “Integrations” section, followed by your newly created API name.
- Copy the project’s API Key by clicking on the “API Key Secret” button.
Installing Appwrite’s Python Package
Using Python to create a database on the Appwrite cloud requires a Python package called appwrite, which provides API access to interact with the Appwrite backend and perform various tasks.
Open a terminal window and type the following command to install the Python package appwrite with pip.
|
1 |
pip install appwrite |
Creating a Database
Creating a database on the Appwrite cloud involves simple steps. With all the required credentials gathered, let’s create a database using Python.
Importing Required Modules
|
1 2 3 4 5 |
from appwrite.client import Client from appwrite.services.databases import Databases from appwrite.id import ID import os from dotenv import load_dotenv |
from appwrite.client import Client: To interact with the Appwrite API, the Client class is imported from the appwrite.client module. The Client class will allow you to configure the API key, Project ID, and API endpoint for making Appwrite backend requests.
from appwrite.services.databases import Databases: To work with Database on the Appwrite cloud, the Databases class is imported from the appwrite.services.databases module.
from appwrite.id import ID: To generate unique IDs that can be used within Appwrite, the ID class is imported from the appwrite.id module.
import os: To interact with the operating system, the os module is imported.
from dotenv import load_dotenv: To load environment variables to the Python file. The library can be installed with pip install python-dotenv, if it is not installed.
Configuring the Appwrite Client for API Access
|
1 2 3 4 5 6 7 8 9 10 11 12 13 14 15 16 |
""" Configuring Appwrite Client """ # Instantiating Appwrite Client client = Client() # To load environment variables load_dotenv() # Configuring Appwrite Client (client # Setting API Endpoint .set_endpoint('https://cloud.appwrite.io/v1') # Setting Project ID .set_project(os.getenv('PROJECT_ID')) # Setting API Key .set_key(os.getenv('API_KEY')) ) |
Instantiating Appwrite Client: The Client class instance is created and stored in the client variable.
The environment variables (PROJECT_ID and API_KEY) are loaded into the script using the load_dotenv() function.
Setting API Endpoint: The Appwrite client’s set_endpoint() method is used to set the API endpoint to the URL 'https://cloud.appwrite.io/v1'.
Setting Project ID: The Appwrite client’s set_project() method is used to set the Project ID of the project by retrieving it from the environment variable 'PROJECT ID' using os.getenv('PROJECT ID').
Setting API Key: Similarly, the API key is set with the set_key() method, and it was retrieved from the environment variable 'API_KEY' with os.getenv('API_KEY').
Creating a New Database
|
1 2 3 4 5 6 7 8 9 10 |
""" Creating Database """ # Initializing databases service databases = Databases(client) # To generate unique database ID db_id = ID.unique() # Creating a new database create_db = databases.create(db_id, 'BooksDB') print("Database Successfully Created.") |
The Databases instance is created with Databases(client) and saved in the databases variable. This enables interaction with the Appwrite Database API and the execution of various database-related tasks.
The ID.unique() method is used to generate a unique ID for the database, which is then stored in the db_id variable.
The code then creates a database by calling the databases.create() method, which takes two parameters: the database ID in this case, db_id, and the database name, which in this case is 'BooksDB'.
If you run the file, the database will be created and will be visible on the Appwrite cloud.
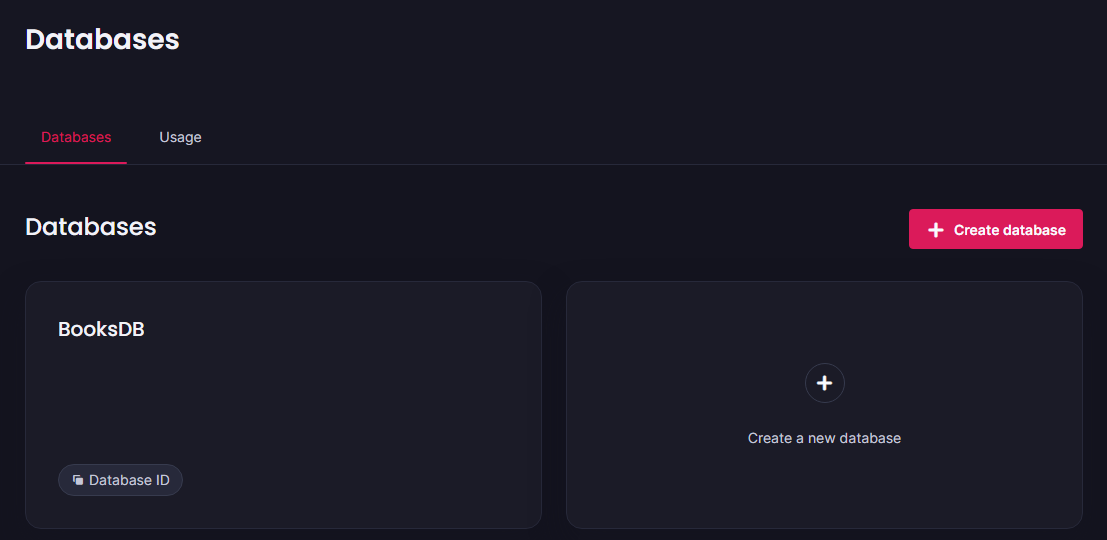
Creating a database is not sufficient, especially if you intend to connect it to a web app. It’s required for CRUD operations like adding new data, updating it, reading it, and even deleting it.
To create a fully functional database for data storage, the following must be created:
- Collections
- Attributes
- Documents
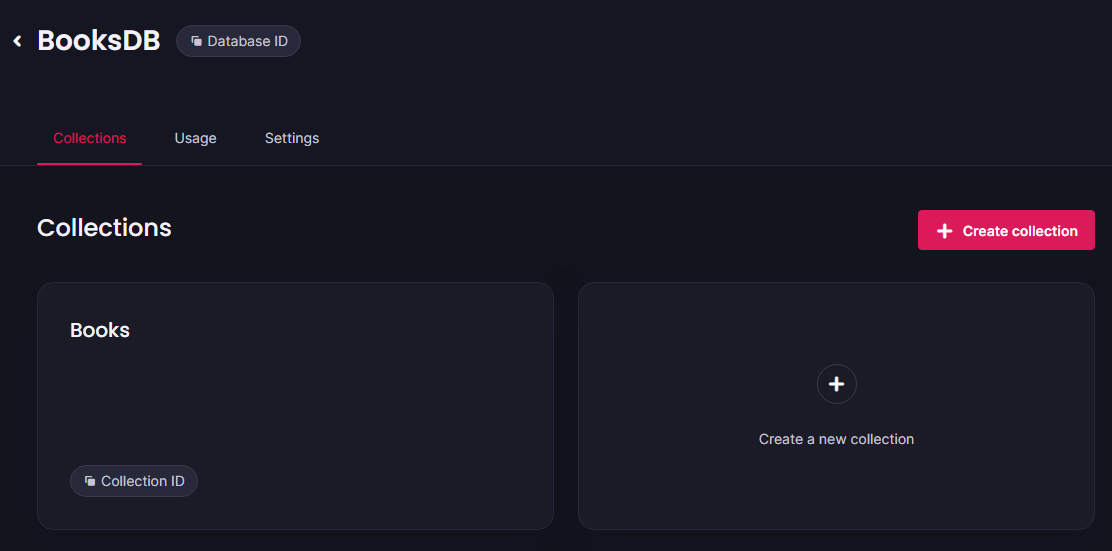
Creating Collections
Collections in the Appwrite database are data storage containers similar to tables in traditional databases.
You can create multiple collections in a single Appwrite database to store and manage data from various sources, which will aid in data management.
|
1 2 3 4 5 6 7 8 9 10 11 12 |
"""Creating Collections""" # Database ID database_id = create_db['$id'] # For Generating Unique Collection ID collection_id = ID.unique() # Creating a New Collection new_collection = databases.create_collection(database_id=database_id, collection_id=collection_id, name='Books') print('Collection Successfully Created.') |
The database ID is retrieved using create_db['$id'] and stored in the database_id variable.
The ID.unique() method is used to generate a unique ID for the collection in the database and the resulting ID is stored in the collection_id variable.
To create a new collection, the databases.create_collection() method is used. It accepts three required arguments: database_id, which represents the ID of the database where the collection will be created, collection_id, a unique ID to ensure no conflicts with existing collections, and name, which specifies the name of the new collection, which is "Books" in this case.
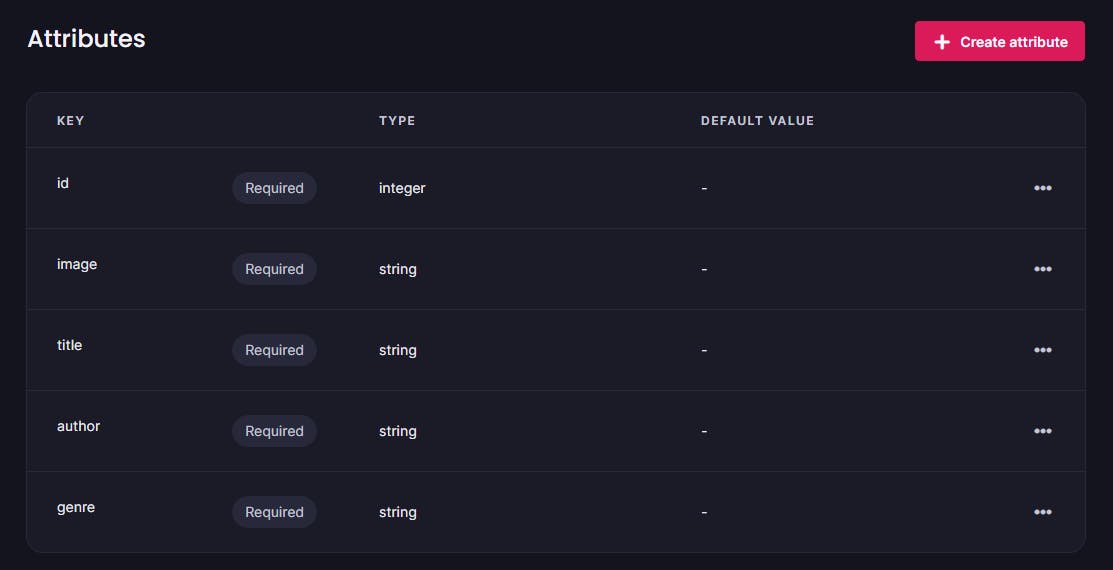
Creating Attributes
Following the completion of collections, the next step is to create attributes. The attributes define the schema of the data. Attributes are of different types, you can choose as per requirement.
Attributes are similar to fields in a traditional database table, where data is stored under the respective field. This ensures a standardized structure of the documents in the Appwrite database.
Since the database is for Book details, the schema will be as follows:
id–integer: Used to store the book’s ID.image–url: Book imagetitle–string: The title of the bookauthor–string: The author of the bookgenre–string: The book’s genre
The attributes will be generated based on the fields listed above.
|
1 2 3 4 5 6 7 8 9 10 11 12 13 14 15 16 17 18 19 20 21 22 23 24 25 26 27 28 29 30 31 32 33 34 35 36 37 38 39 40 41 |
"""Creating Attributes""" # Collection ID of Book c_id = new_collection['$id'] """ Creating integer attribute """ # ID Attribute book_id = databases.create_integer_attribute(database_id=database_id, collection_id=c_id, key="id", required=True) """ Creating url attribute """ # URL Attribute book_url = databases.create_url_attribute(database_id=database_id, collection_id=c_id, key="image", required=True) """ Creating string attribute """ # Title Attribute book_title = databases.create_string_attribute(database_id=database_id, collection_id=c_id, key="title", required=True, size=100) # Author Attribute book_author = databases.create_string_attribute(database_id=database_id, collection_id=c_id, key="author", required=True, size=50) # Genre Attribute book_genre = databases.create_string_attribute(database_id=database_id, collection_id=c_id, key="genre", required=True, size=50) print("Attributes Successfully Created.") |
The create_integer_attribute() method is used to create the integer attribute “id” for the “Books” collection. This method is invoked with four mandatory arguments: database_id (set to database_id), collection_id (set to c_id), key (set to "id" as the attribute name), and required (set to True to indicate that the value of this attribute cannot be left empty).
The create_url_attribute() method is used to create the URL attribute “image” for the “Books” collection. This method is also called with four mandatory arguments: database_id, collection_id, key set to "image", and required parameter set to True.
Finally, the create_string_attribute() method is used to create three string attributes, namely “title”, “author”, and “genre” for the “Books” collection. This method requires five parameters: database_id, collection_id, key, required, and size, which is the maximum number of characters allowed for the attribute.
Now that all processes have been completed and the database is ready, you can add data from the frontend and store it as documents within the database.
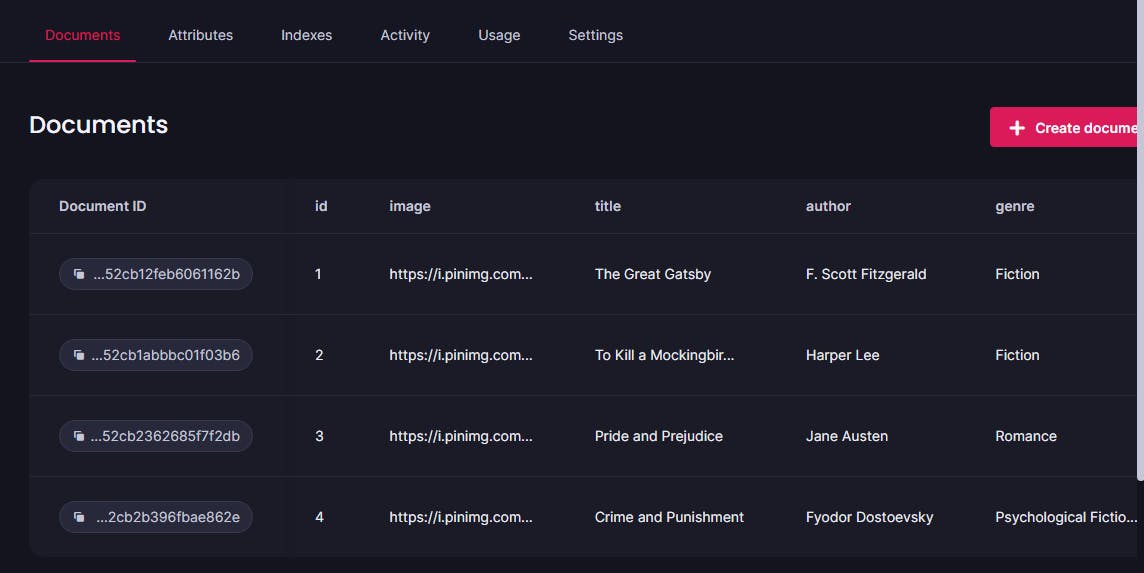
Adding Documents
Following the schema that was created in the previous section, data will be added programmatically within the collection called “Books” in the database called “BooksDB” in this section.
|
1 2 3 4 5 6 7 8 9 10 11 12 13 14 15 16 17 18 19 20 21 22 23 |
""" Adding Documents """ # Unique Identifier for Document ID document_id = ID.unique() """ Function for Adding Documents(data) in the Database """ def add_doc(document): try: doc = databases.create_document( database_id=database_id, collection_id=c_id, document_id=document_id, data=document ) print("Id:", doc['id']) print("Image:", doc['image']) print("Title:", doc['title']) print("Author:", doc['author']) print("Genre:", doc['genre']) print("-" * 20) except Exception as e: print(e) |
The code defines an add_doc function that takes a single argument named document. Within the function’s try block, the databases.create_document() method is invoked to generate a document, which is subsequently stored in the doc variable.
This method requires four mandatory parameters: database_id (set as database_id), collection_id (set as c_id), document_id (representing a unique ID for the document, specifically assigned as document_id), and data (representing the document’s content formatted in a dictionary).
The doc variable stores a dictionary returned by the databases.create_document(). Utilizing this doc variable, the code retrieves the id, image, title, author, and genre of the added document and prints them.
If an exception arises during the try block’s execution, the code captures the error and displays an error message.
Data
|
1 2 3 4 5 6 7 8 9 10 11 12 13 14 15 16 17 18 19 20 21 22 23 24 25 26 27 28 29 30 31 32 33 34 35 36 37 38 39 |
# Data To Be Added book_1 = { "id": 1, "image": "https://i.pinimg.com/474x/dc/17/2d/dc172d6fa3f5461d94e6d384aded2cb4.jpg", "title": "The Great Gatsby", "author": "F. Scott Fitzgerald", "genre": "Fiction" } book_2 = { "id": 2, "image": "https://i.pinimg.com/originals/0b/bf/b5/0bbfb59b4d5592e2e7fac9930012ce6d.jpg", "title": "To Kill a Mockingbird", "author": "Harper Lee", "genre": "Fiction" } book_3 = { "id": 3, "image": "https://i.pinimg.com/736x/66/1d/17/661d179ab722e67eed274d24b8965b0d.jpg", "title": "Pride and Prejudice", "author": "Jane Austen", "genre": "Romance" } book_4 = { "id": 4, "image": "https://i.pinimg.com/originals/68/c5/4c/68c54c9599ba37d9ab98c0c51afe2298.png", "title": "Crime and Punishment", "author": "Fyodor Dostoevsky", "genre": "Psychological Fiction" } # Calling function with the data to be added add_doc(book_1) add_doc(book_2) add_doc(book_3) add_doc(book_4) print("Documents Successfully Added.") |
When you run the whole code, the following output will be prompted and the database, collection, and attributes will be created and documents will then be added.
|
1 2 3 4 5 6 7 8 9 10 11 12 13 14 15 16 17 18 19 20 21 22 23 24 25 26 27 28 |
Database Successfully Created. Collection Successfully Created. Attributes Successfully Created. Id: 1 Image: https://i.pinimg.com/474x/dc/17/2d/dc172d6fa3f5461d94e6d384aded2cb4.jpg Title: The Great Gatsby Author: F. Scott Fitzgerald Genre: Fiction -------------------- Id: 2 Image: https://i.pinimg.com/originals/0b/bf/b5/0bbfb59b4d5592e2e7fac9930012ce6d.jpg Title: To Kill a Mockingbird Author: Harper Lee Genre: Fiction -------------------- Id: 3 Image: https://i.pinimg.com/736x/66/1d/17/661d179ab722e67eed274d24b8965b0d.jpg Title: Pride and Prejudice Author: Jane Austen Genre: Romance -------------------- Id: 4 Image: https://i.pinimg.com/originals/68/c5/4c/68c54c9599ba37d9ab98c0c51afe2298.png Title: Crime and Punishment Author: Fyodor Dostoevsky Genre: Psychological Fiction -------------------- Documents Successfully Added. |
Source Code
Access the full source code from the following GitHub repository, clone or download the code and run it in your favorite IDE.
Python Script For Creating Appwrite Database
Conclusion
The tutorial walked you through the steps of setting up a new database in the Appwrite cloud. It also includes instructions for creating a new project, creating an API key for the project, and obtaining the project ID and API key from the Appwrite cloud.
Following the creation of the database, the tutorial takes you through the steps of making it fully functional by adding collections and attributes. The documents (data) are then added programmatically.
Let’s go over the steps in this tutorial for creating a new database:
- Obtaining the necessary Appwrite cloud credentials
- Installing the Python package
appwrite - Making a database
- Making a collection
- Adding the attributes
- Adding the documents programmatically
🏆Other articles you might be interested in if you liked this one
✅How to connect the PostgreSQL database with Python?
✅Upload and display images on the frontend using Flask in Python.
✅Building a Flask image recognition webapp using a deep learning model.
✅Building a custom deep learning model using transfer learning.
✅How to augment the data for training using Keras and Python?
✅How to build a CLI command in a few steps using argparse in Python?
✅How to use Async/Await like JavaScript in Python?
✅How to scrape a webpage’s content using BeautifulSoup in Python?
That’s all for now
Keep Coding✌✌


