

Jupyter Notebook is most commonly used for data science, machine learning, and visualization. It is an open-source web application that allows us to write and share code.
Jupyter Notebook includes cells that allow us to run our program in sections, making it more interactive and easier for developers to debug, analyze, and test their code.
We sometimes need to display images for analysis or testing purposes. In this article, we’ll look at how to load and display images in Jupyter Notebook.
Using IPython
IPython is an advanced and interactive shell for Python and is used as a kernel for Jupyter. We’ll use some of its classes within the Jupyter Notebook.
IPython Notebook is now known as Jupyter Notebook. The Jupyter project began as IPython and IPython Notebook.
The Image class from the IPython.display is the most commonly used method for displaying images in the Jupyter Notebook. Let us illustrate with an example.
|
1 2 |
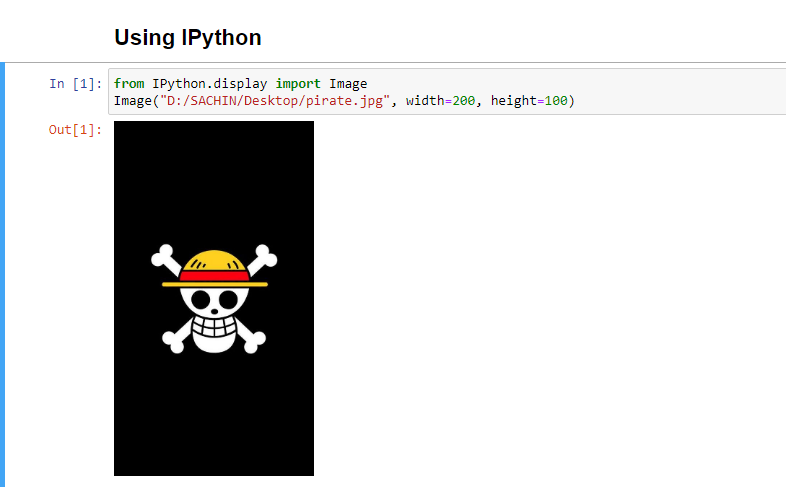
from IPython.display import Image Image("D:/SACHIN/Desktop/pirate.jpg", width=200, height=100) |
First, we imported the Image class from IPython’s display module, then called it with the absolute path to the source image and set the width and height.
Run the above code in a Jupyter Notebook cell, and the image will appear in the output.
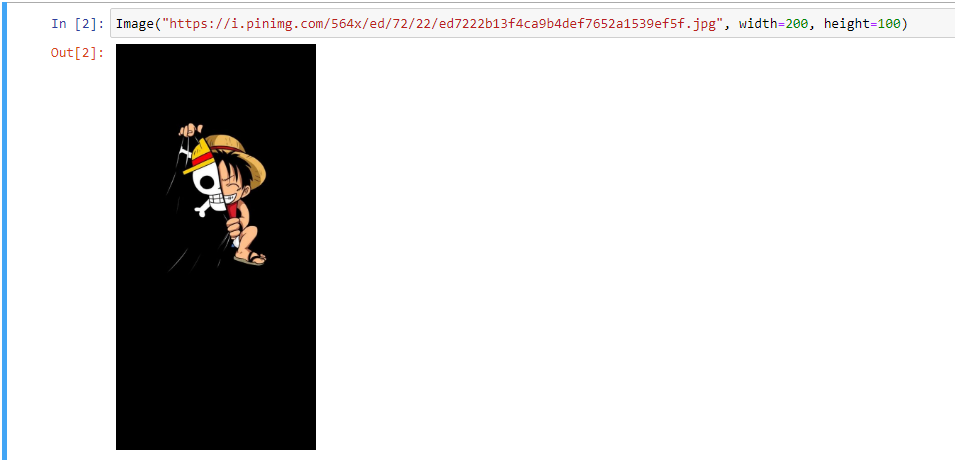
We can, however, show web images. We only need to specify the image’s web address, and then run the cell to see the image.
|
1 |
Image("https://i.pinimg.com/564x/ed/72/22/ed7222b13f4ca9b4def7652a1539ef5f.jpg", width=200, height=100) |
Since we already imported the Image class so we don’t need to import it again, we called the Image class and passed the image’s web address with specific width and height.
The specific image will be displayed in the output after the cell has been run.
Using Matplotlib
The Matplotlib library is used to display data in a variety of charts, plots, and graphs. However, we can use this library to visualize our images.
We’ll see two approaches to reading an image using Matplotlib and displaying it in the Jupyter Notebook.
First Approach
|
1 2 3 4 5 6 7 8 9 |
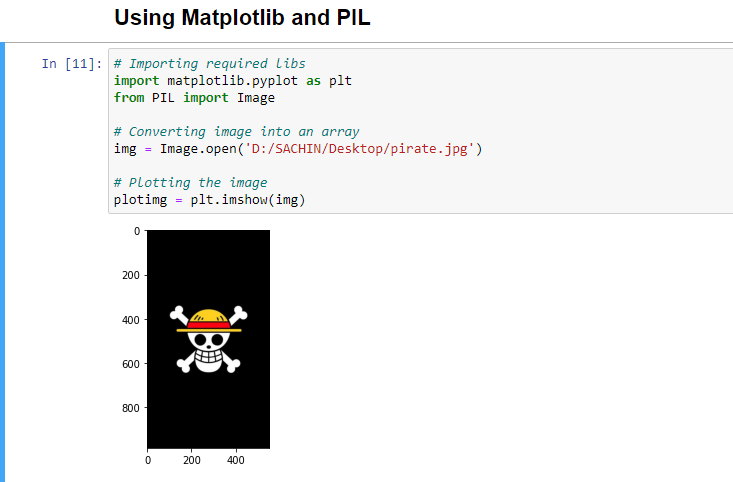
# Importing required libs import matplotlib.pyplot as plt from PIL import Image # Opening image img = Image.open('D:/SACHIN/Desktop/pirate.jpg') # Plotting the image plotimg = plt.imshow(img) |
First, we imported the required libraries which are as follows:
matplotlib.pyplot– to plot the imagePIL– for image processing
Then we passed the path to the image inside the Image.open.
The image was then plotted using the imshow function from matlplotlib.pyplot, with the image passed inside. Run the cell and the image will be displayed.
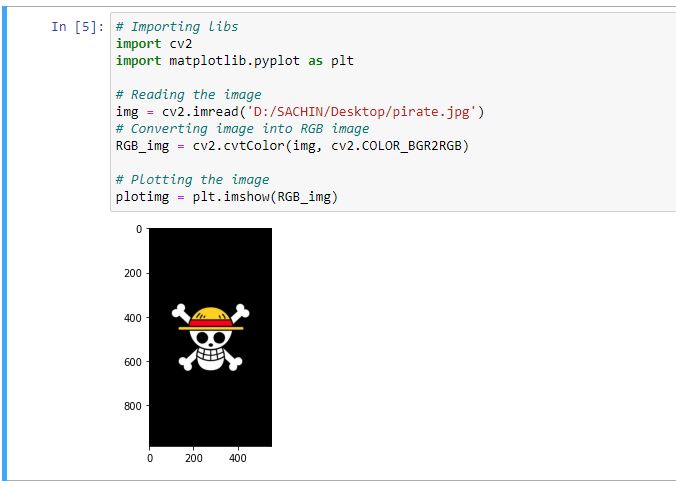
This method also has a variant in which we can use the cv2 library instead of PIL. The code appears to be as follows:
|
1 2 3 4 5 6 7 8 9 10 11 |
# Importing libs import cv2 import matplotlib.pyplot as plt # Reading the image img = cv2.imread('D:/SACHIN/Desktop/pirate.jpg') # Converting image into RGB image rgb_img = cv2.cvtColor(img, cv2.COLOR_BGR2RGB) # Plotting the image plotimg = plt.imshow(rgb_img) |
First, we imported the libraries, and then we read the image with cv2.imread, converted it from BGR to RGB, and plotted it with Matplotlib.
Second Approach
|
1 2 3 4 5 6 7 8 9 |
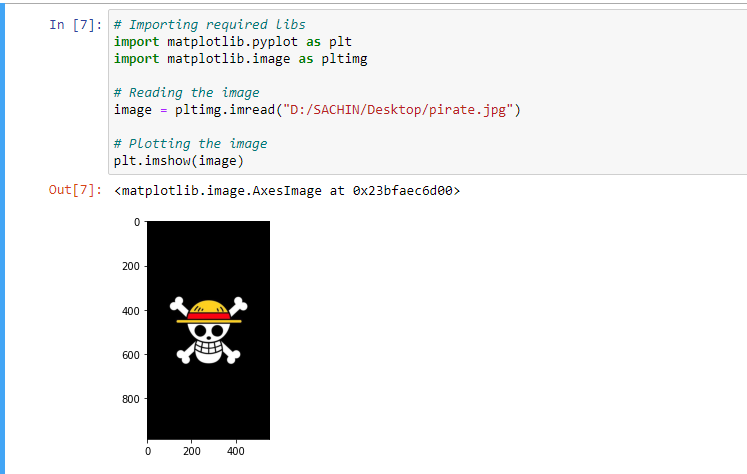
# Importing required libs import matplotlib.pyplot as plt import matplotlib.image as pltimg # Reading the image image = pltimg.imread("D:/SACHIN/Desktop/pirate.jpg") # Plotting the image plt.imshow(image) |
The libraries were imported as follows:
matplotlib.pyplot– to plot the imagesmatplotlib.image– to read the image
This time we didn’t use the PIL or cv2 library instead in this method, we used the image module from the matplotlib library and then called the imread function, passing the path to the image to display.
The image was then plotted using the imshow function. When we run the cell, the image will appear.
Displaying Web Images
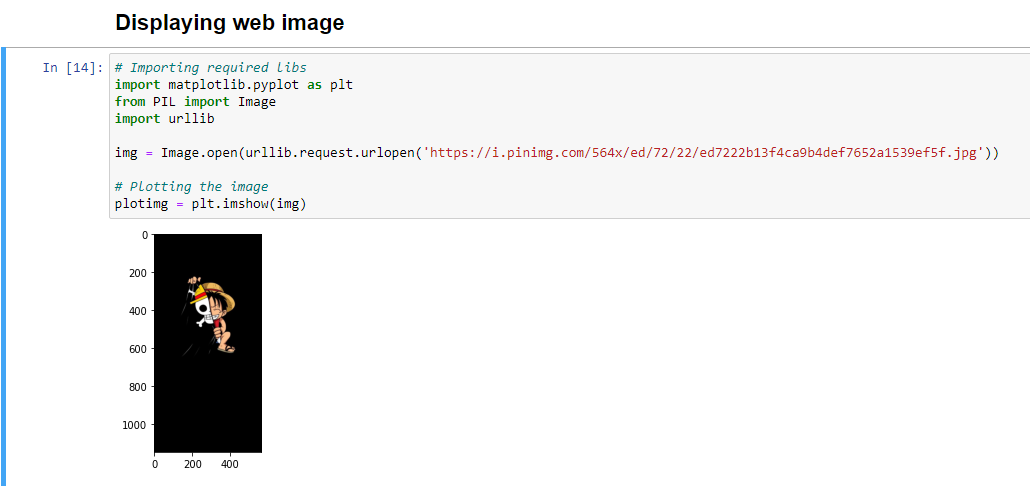
What if we wanted to use Matplotlib to display web images? We can accomplish our goal with the assistance of a few libraries. Let’s take a look at the code.
|
1 2 3 4 5 6 7 8 9 |
# Importing required libs import matplotlib.pyplot as plt from PIL import Image import urllib img = Image.open(urllib.request.urlopen('https://i.pinimg.com/564x/ed/72/22/ed7222b13f4ca9b4def7652a1539ef5f.jpg')) # Plotting the image plotimg = plt.imshow(img) |
The additional library we imported is urllib, which will assist us in working with URLs.
We opened the URL of the image with urllib.request.urlopen and passed it inside Image.open. The image was then plotted using the imshow function.
Using Markdown
We don’t need to write any code for this technique; we just need to add a markdown command to display the image.
|
1 |
 |
Before running the above markdown command, be sure to set the cell to Markdown mode.
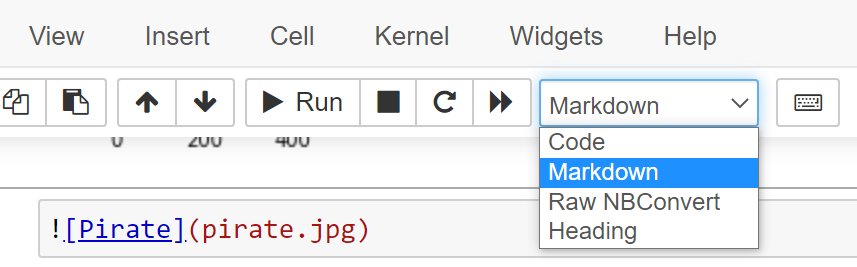
After changing the cell mode to Markdown, run the cell and the image will be displayed.

The same process also goes for the web image.
|
1 |
 |

We can also use plain HTML to set the width and height of the image to our specifications.
|
1 |
<img src="pirate.jpg" width=200 height=100 /> |
Run the cell in Markdown mode and the image will be displayed.

Conclusion
We’ve seen how to display local and web images using various methods in the Jupyter Notebook. We’ve seen the following methods:
- IPython Implementation
- Matplotlib and PIL are used.
- Making Use of Markdown
The first method is the most common way to display images in Jupyter Notebook, but the other two methods are equally effective. Which method we use is entirely up to us.
🏆Other articles you might be interested in if you liked this one
✅Upload and display images on the frontend using Flask in Python.
✅Display images on the frontend using the FastAPI framework.
✅Generate and manipulate temporary files using tempfile in Python.
✅Using match-case statement for pattern matching in Python.
✅Get started with the FastAPI web framework to build REST APIs.
✅Understanding the basics of Python’s ABC.
✅Using __str__ and __repr__ to change string representation of the objects in Python.
That’s all for now
KeepCoding✌✌


